It’s that time of year again, the Foundations Revealed Contest! This is an international corsetry and historical fashion contest. Last year my entry was the Midnight Ulysses corset, and I was super proud to be a finalist in the advanced category. This year the theme is architecture, and everyone has been working on some exciting designs!
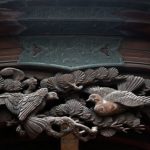
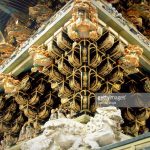
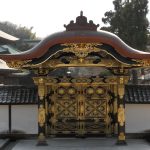
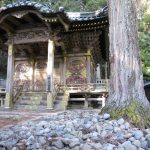
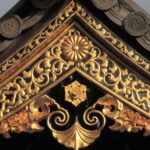
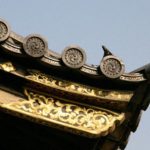
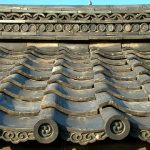
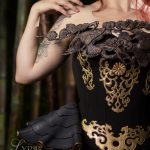
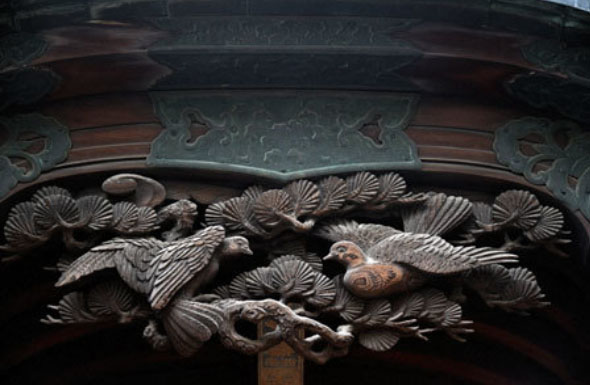
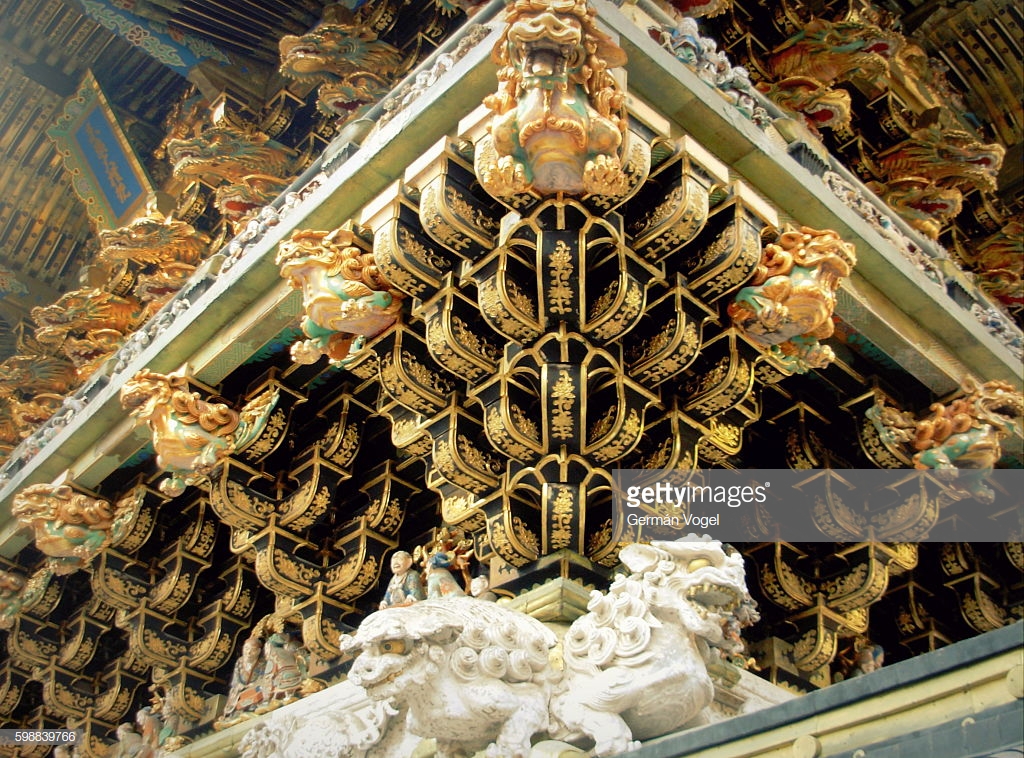
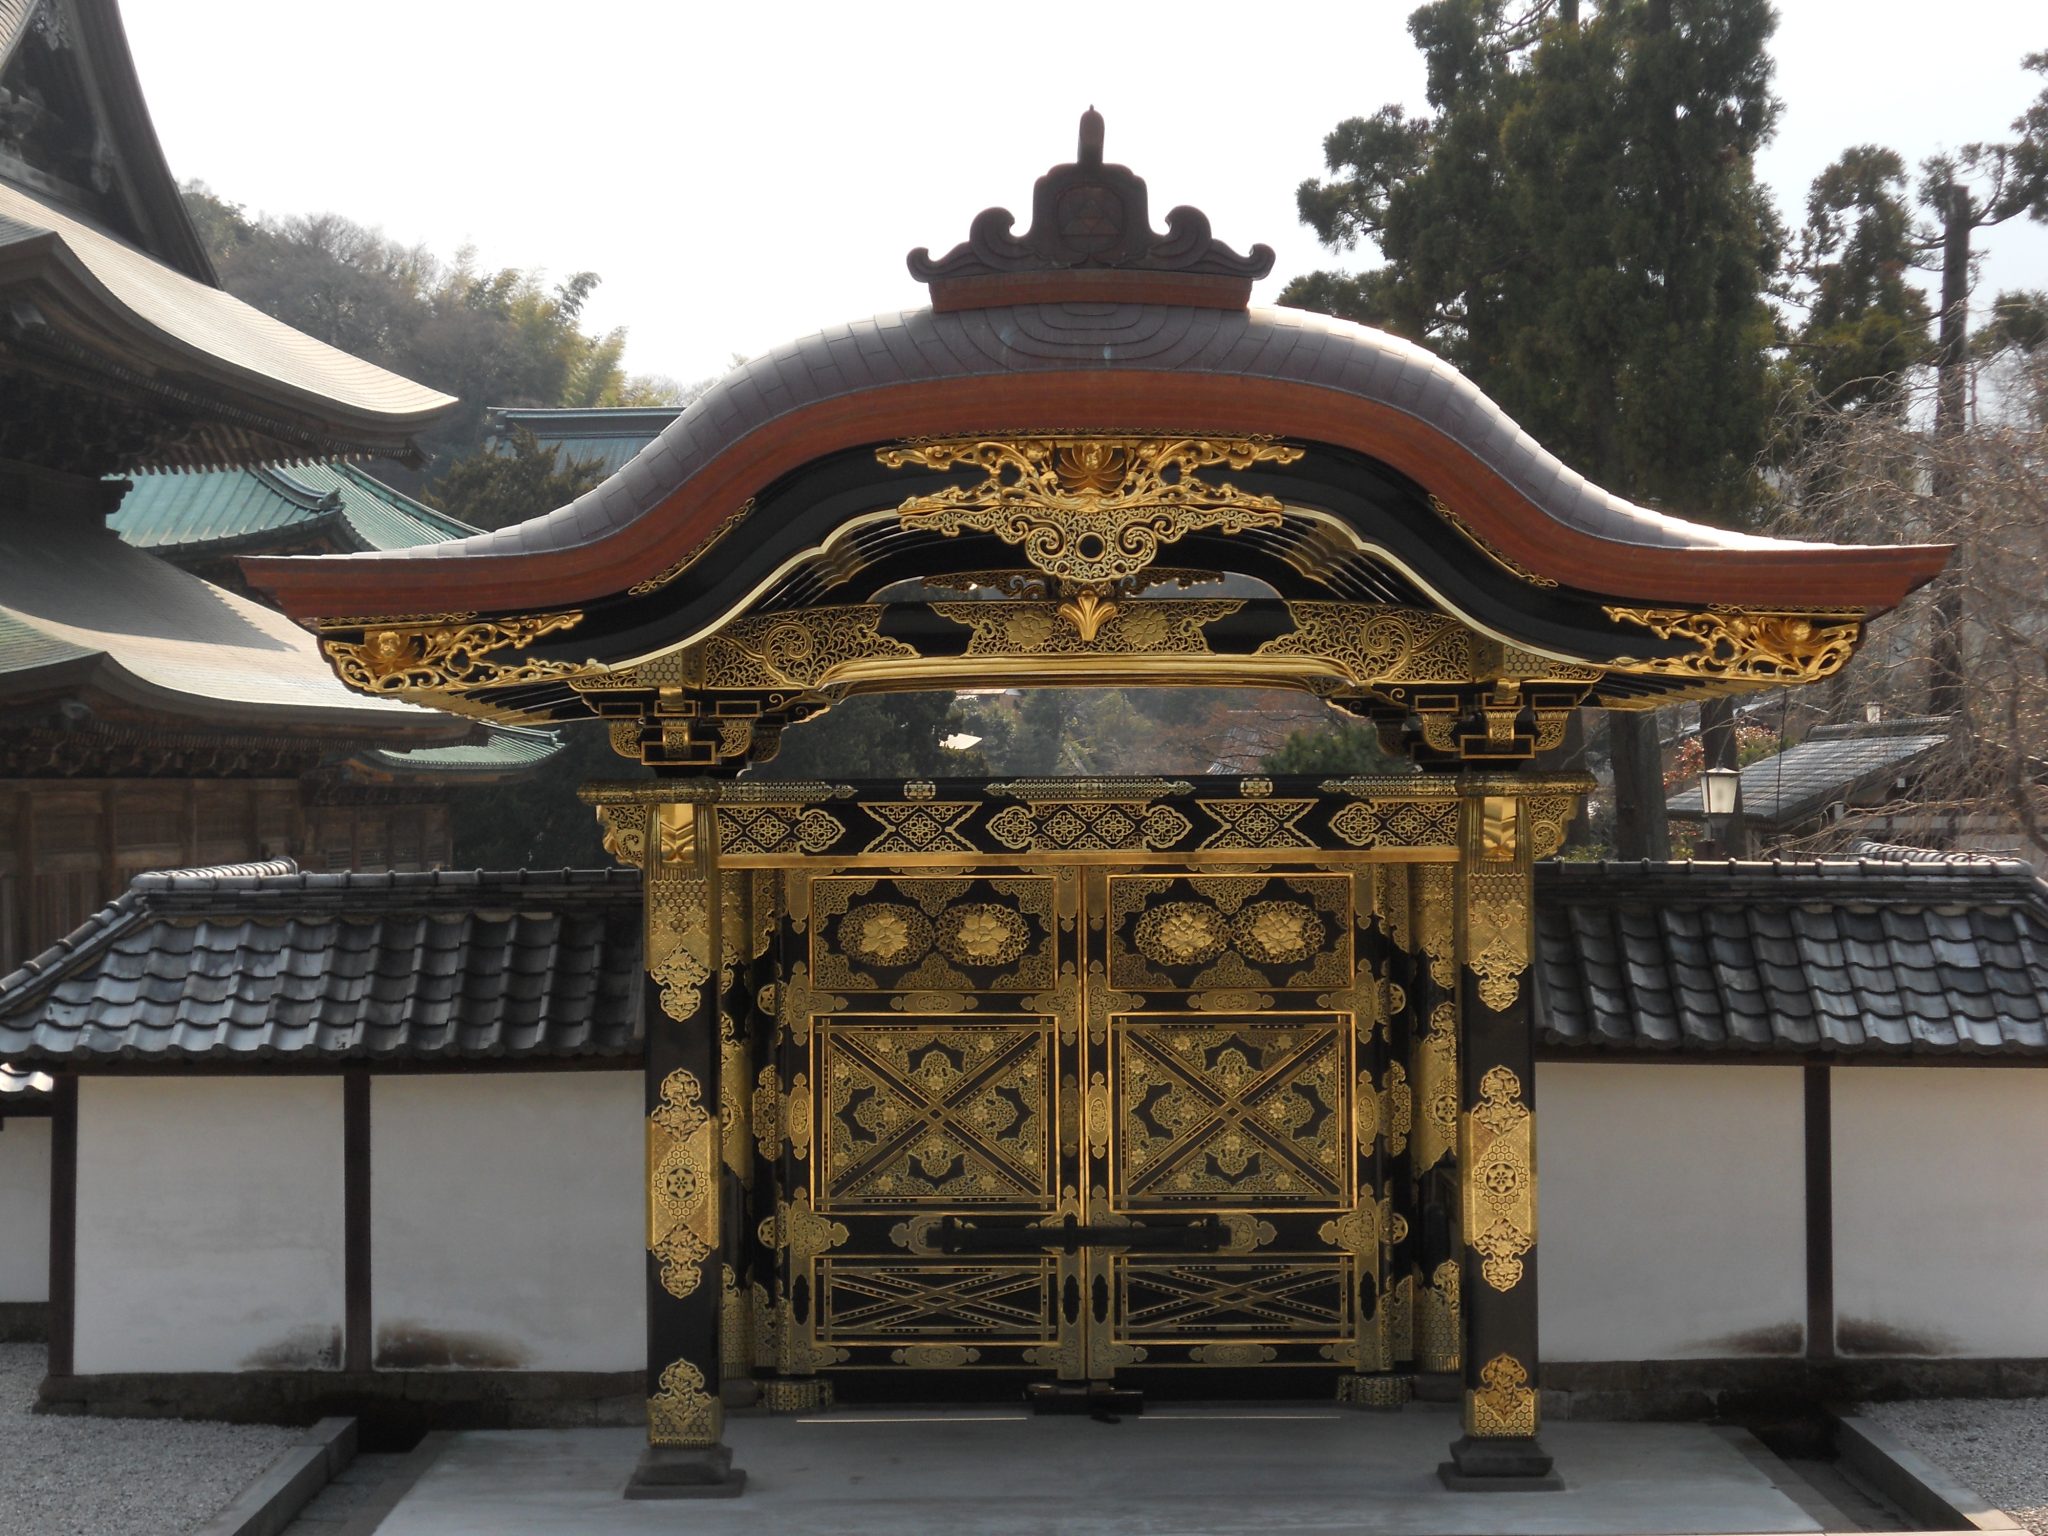
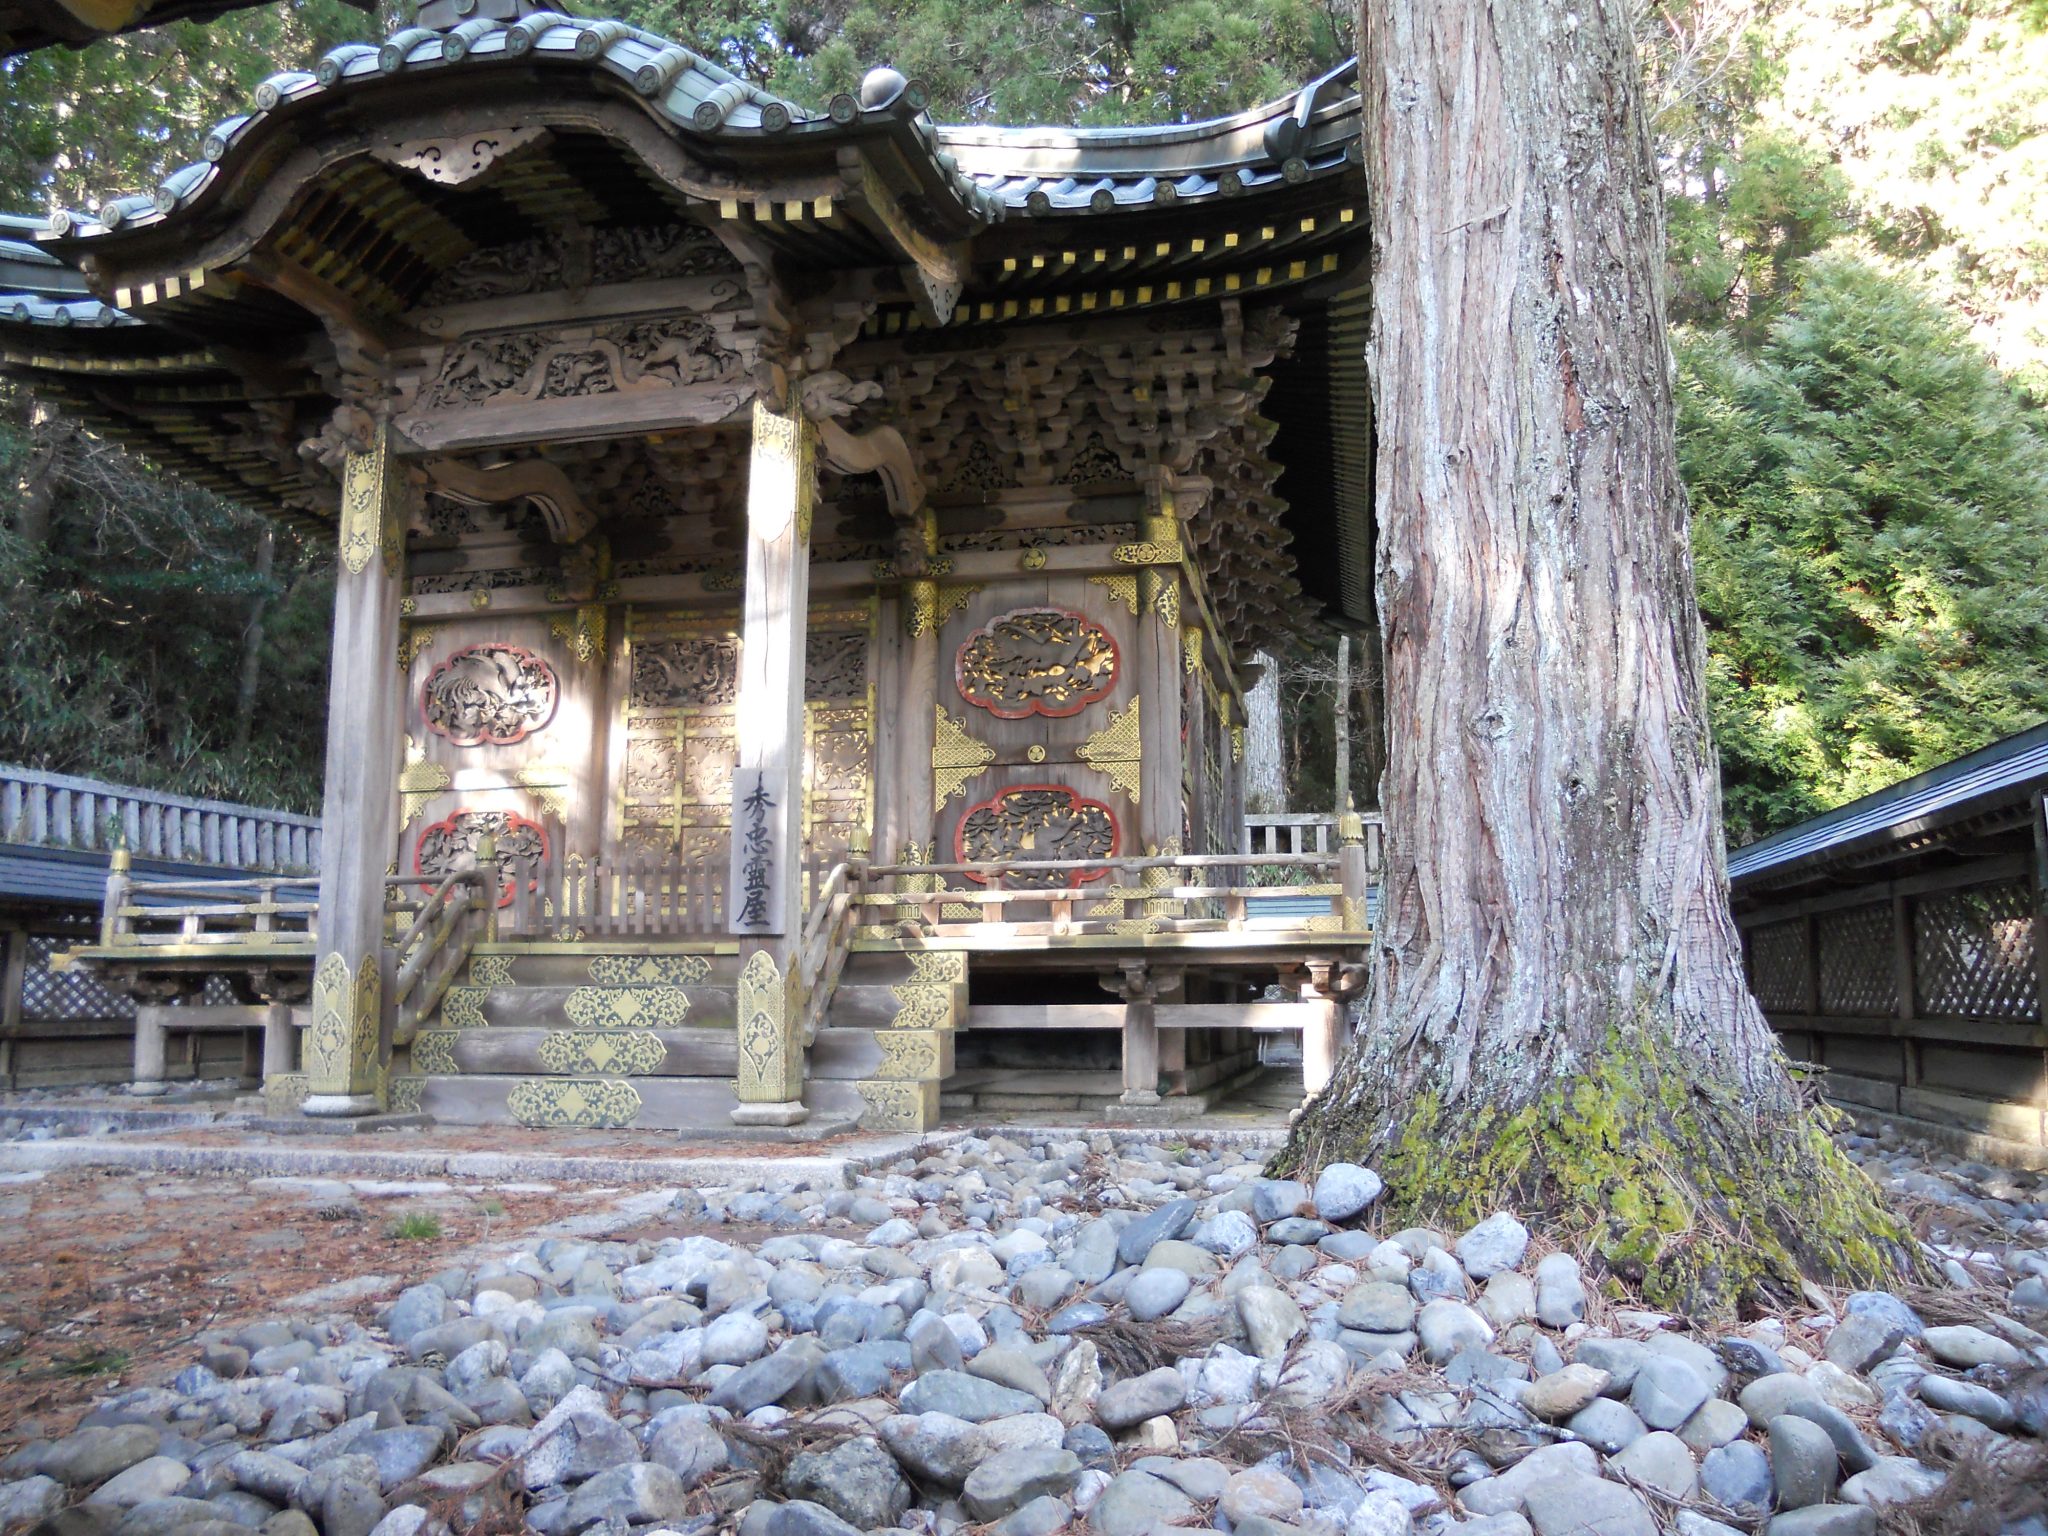
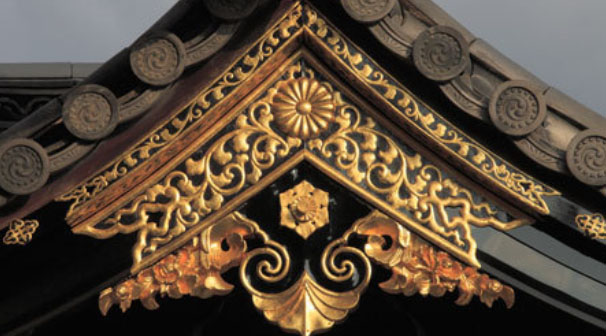
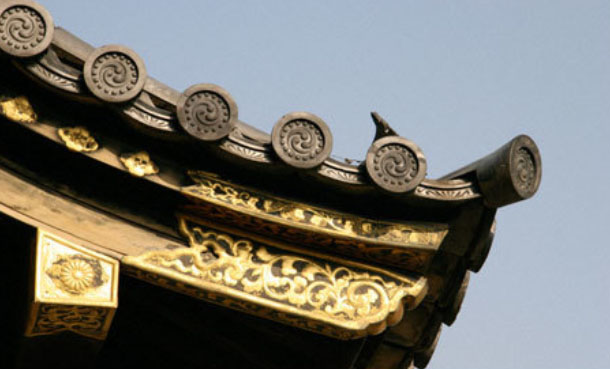
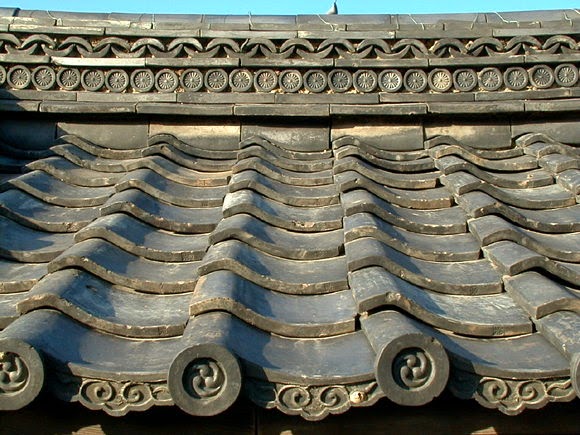
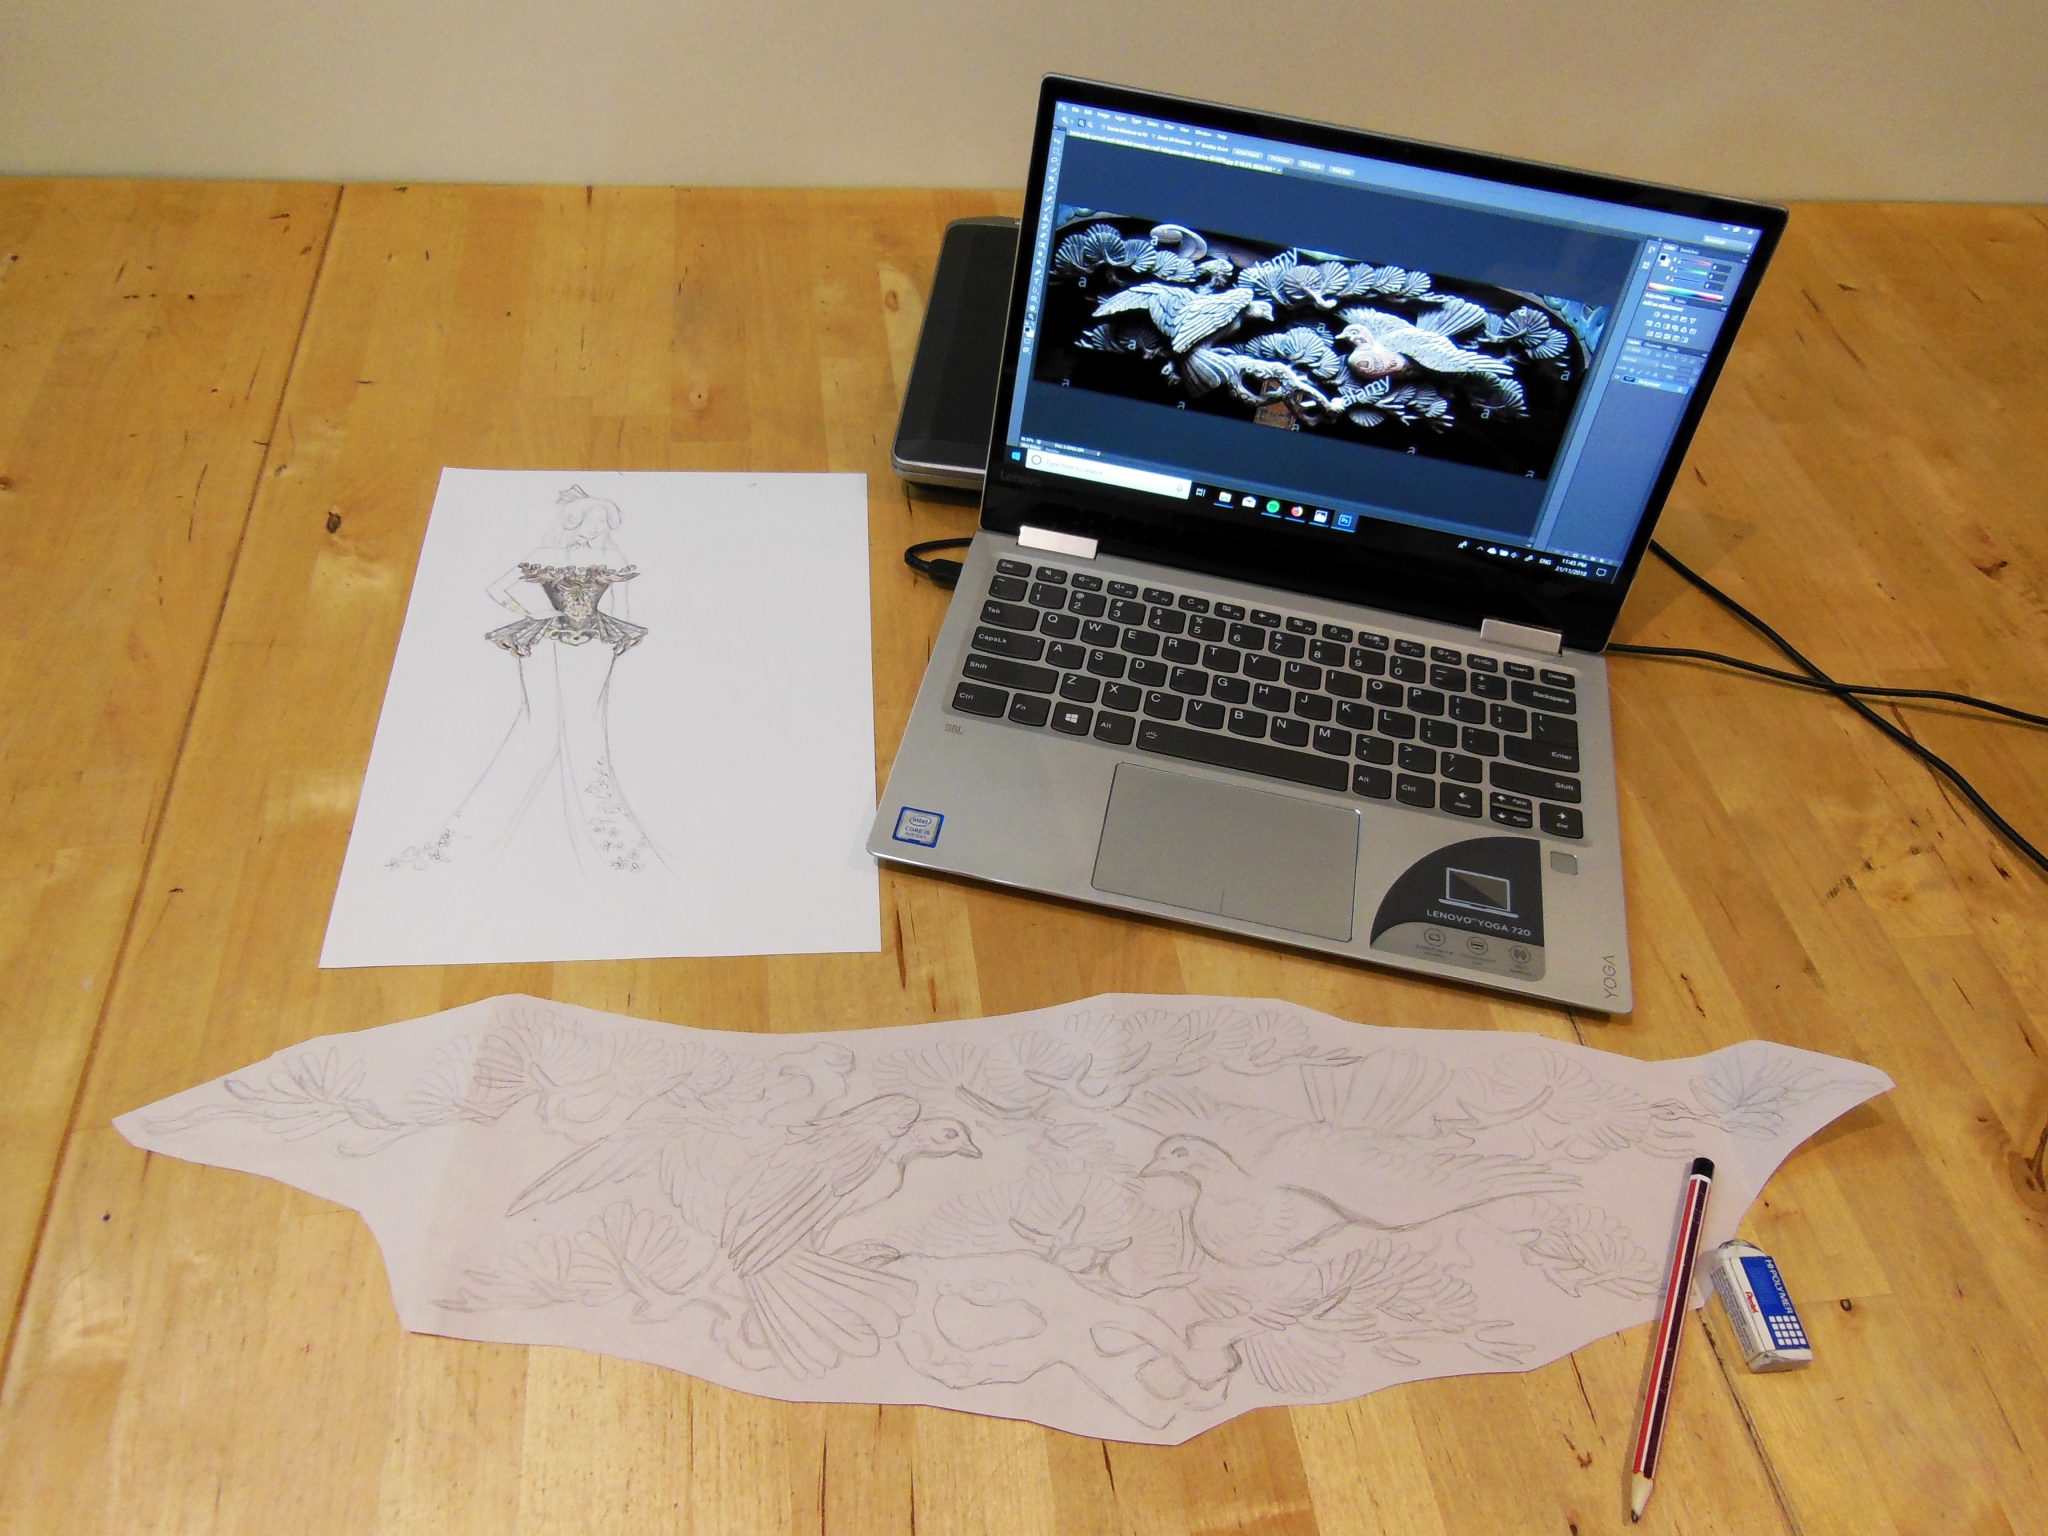
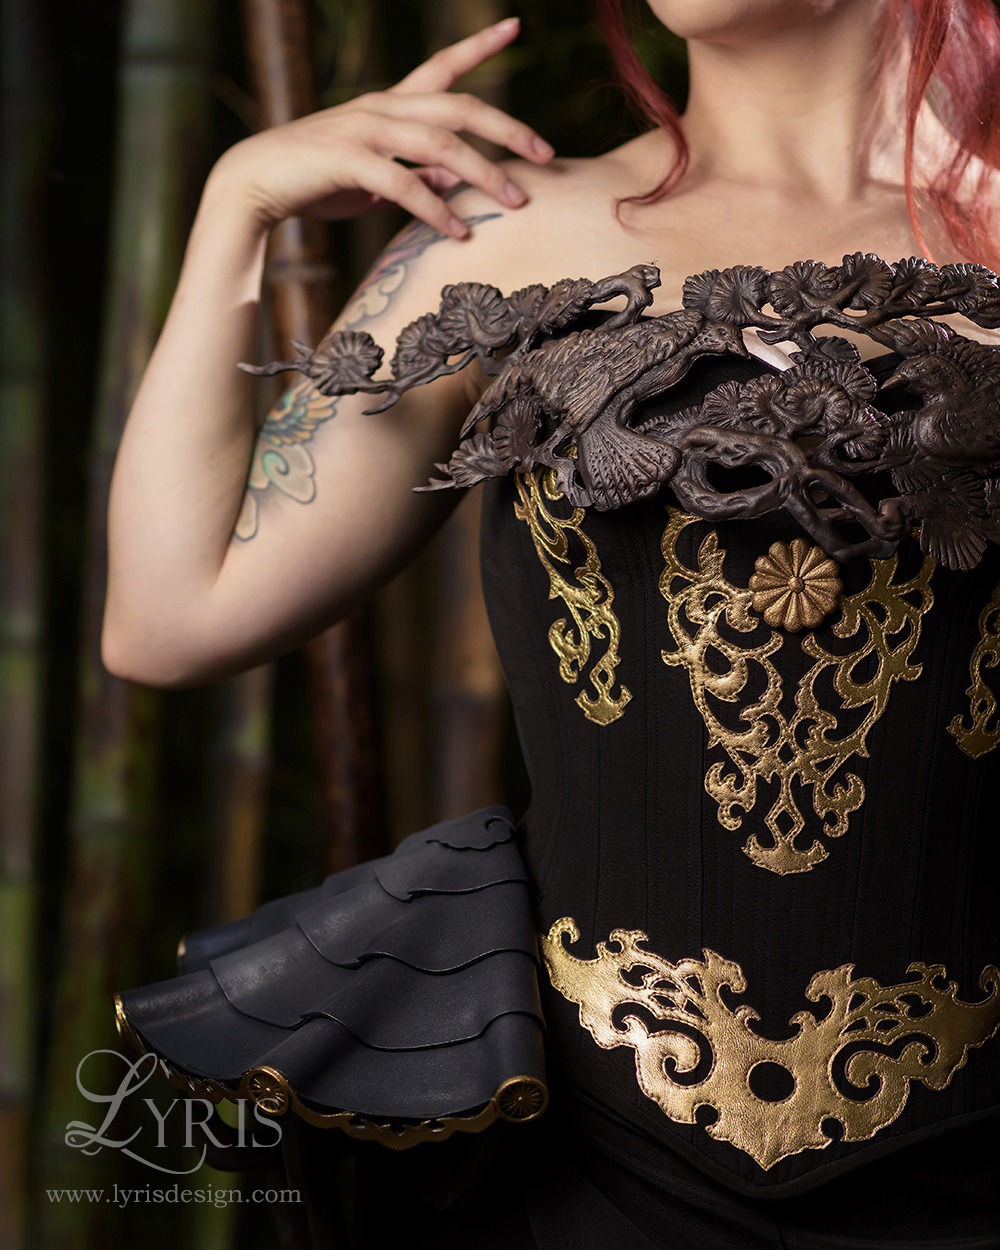
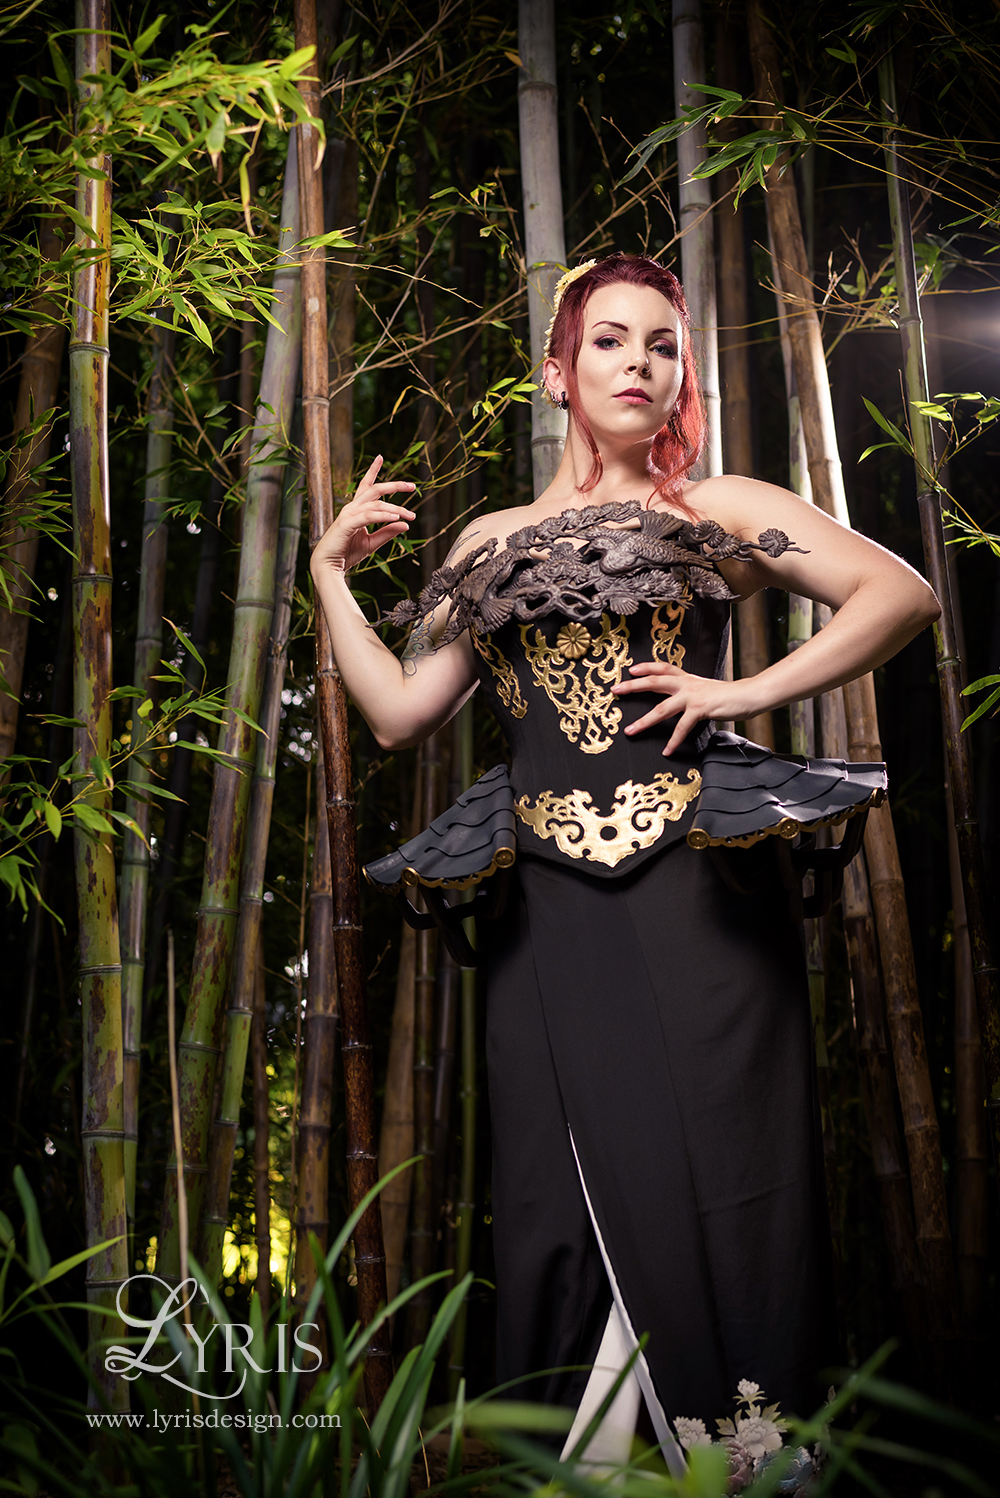
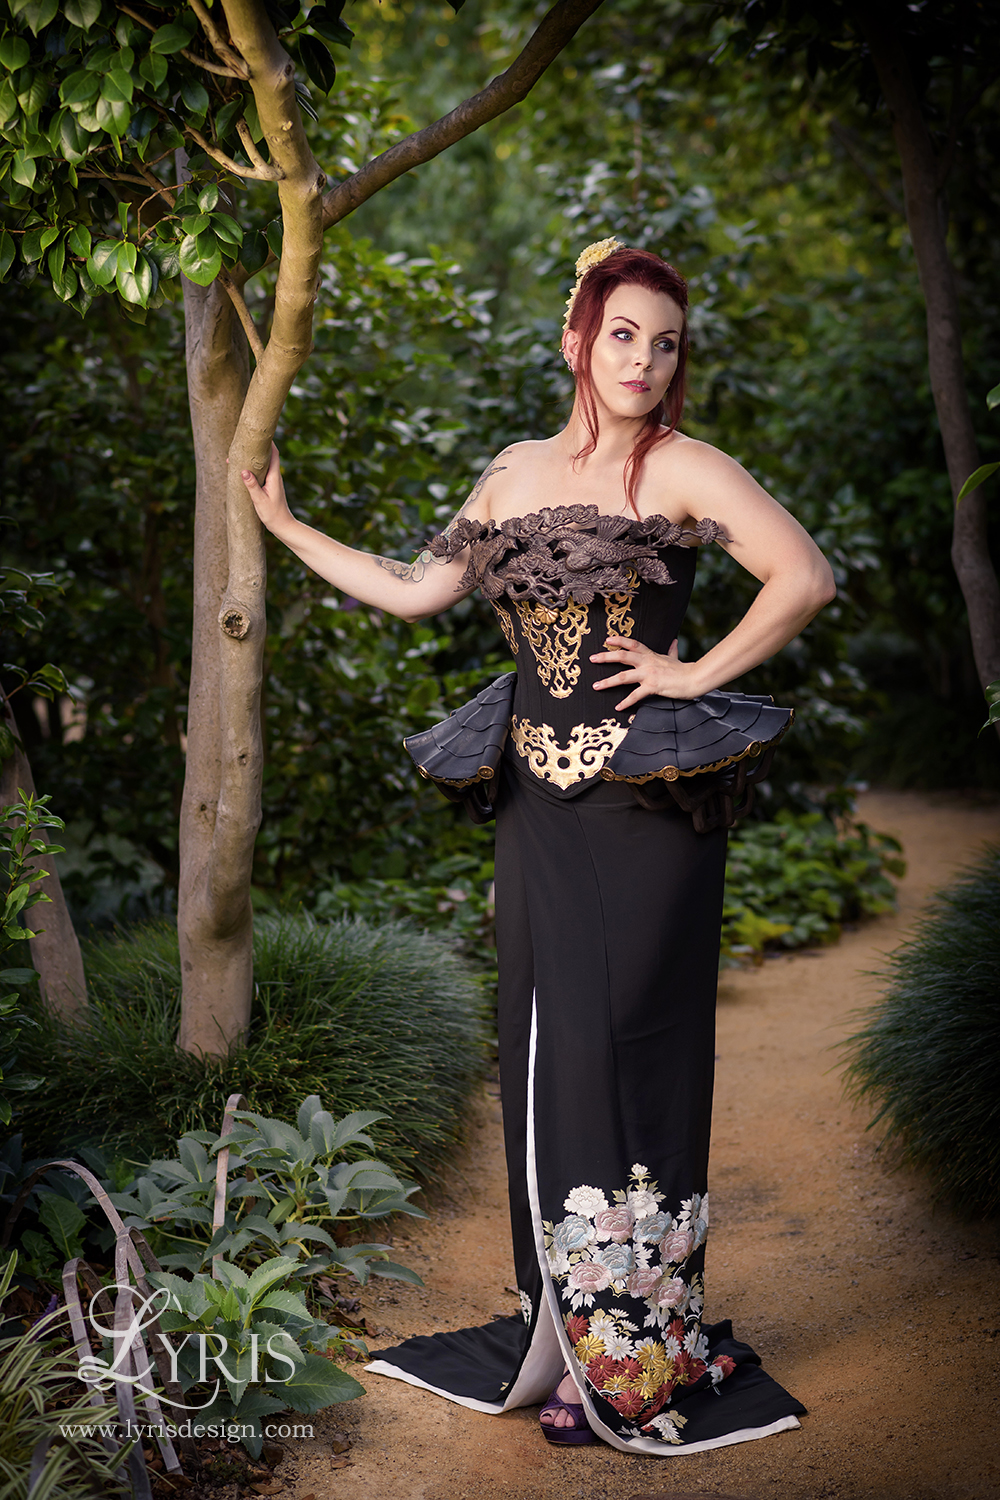
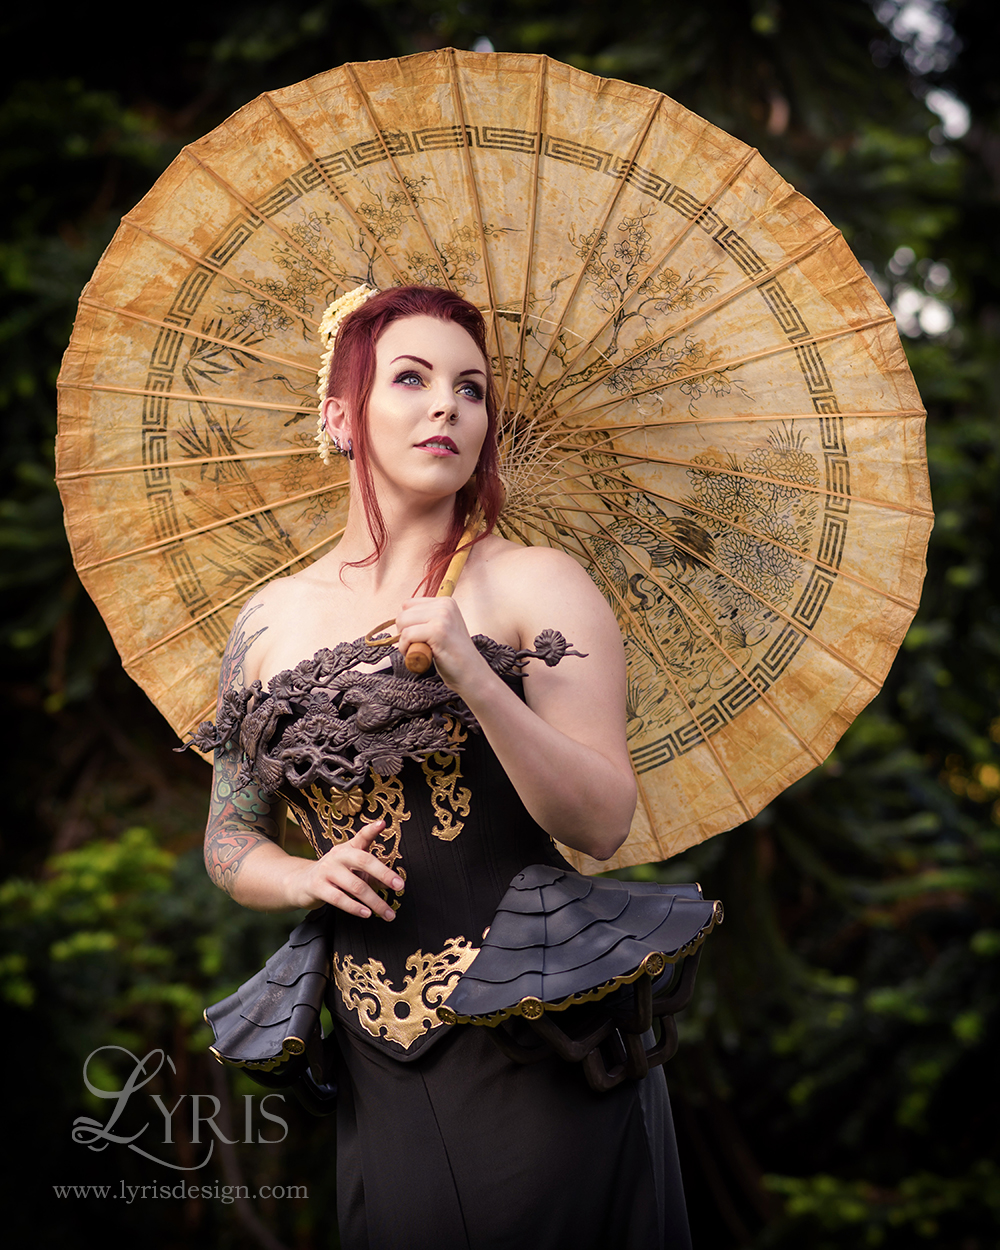
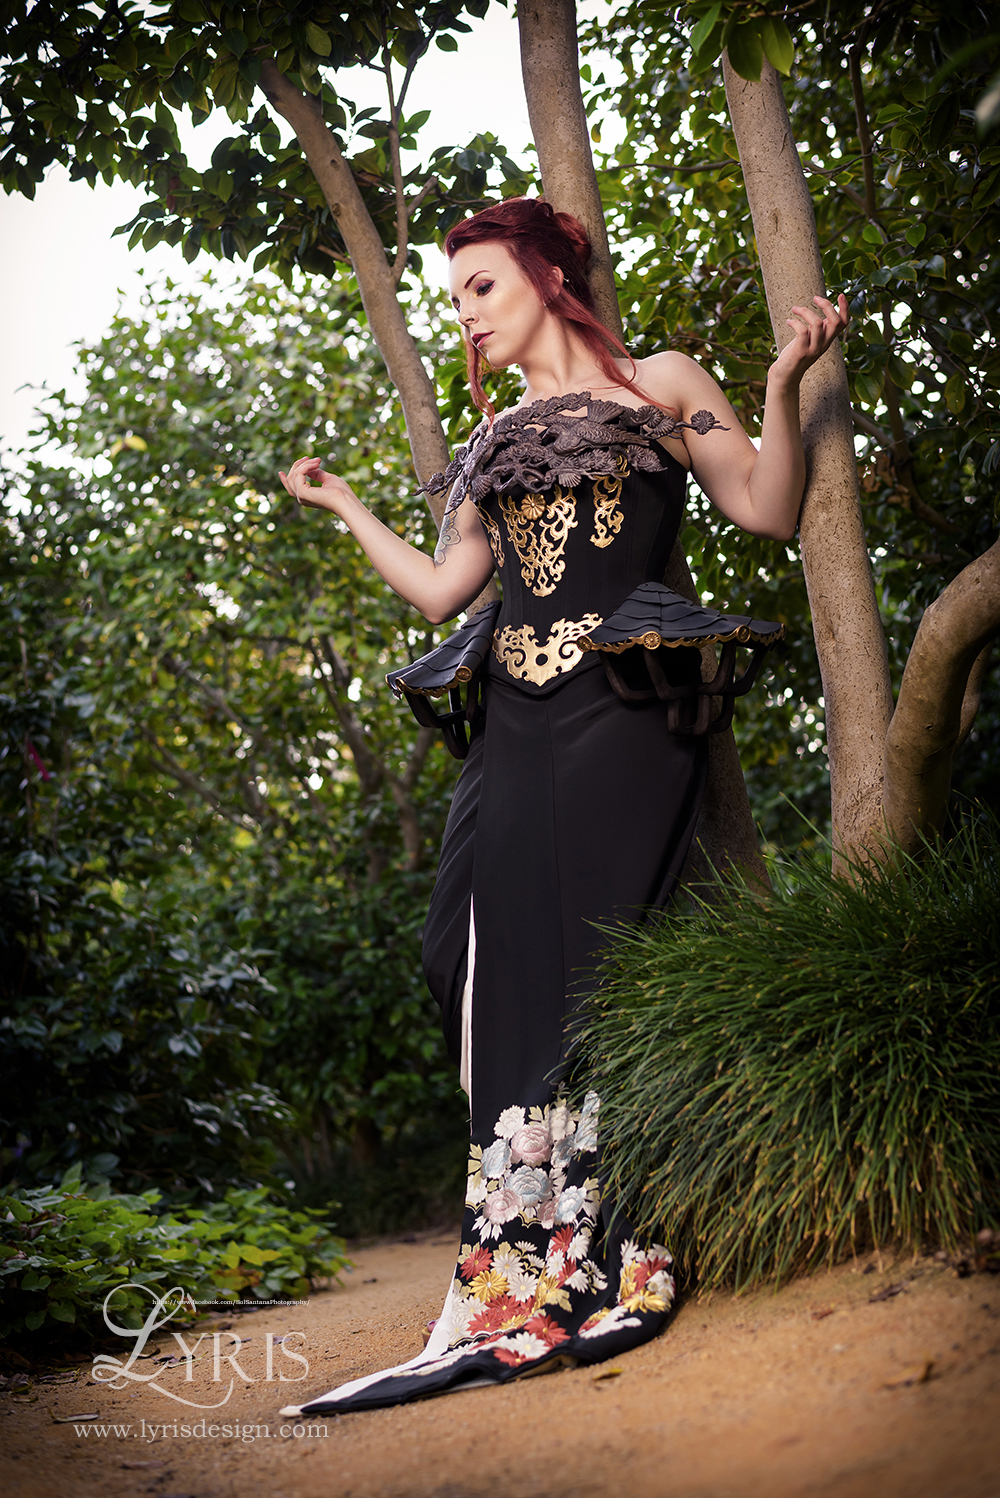
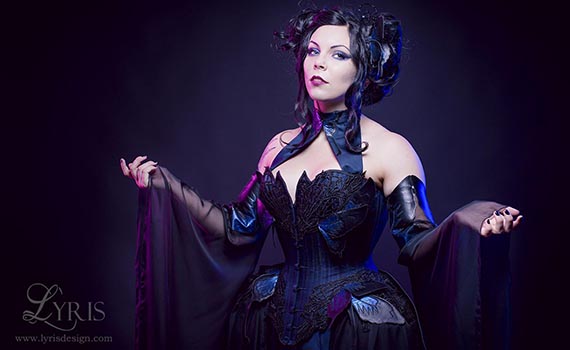
This corset was inspired by Shinto shrines and palaces in Japan. I have a strong passion for Japanese styling, and lived in Japan for several years, so when the competition theme was announced I knew what my inspiration would be. I went through my own photos from living there to pick out architectural details that sparked ideas for my design. My favourite elements were the elaborate wooden carvings of birds and animals that adorn the lintels of Shinto shrines, the overlapping roof tiling and wooden lattice support struts, the gold filigree metal work, and the palette of aged wood and black lacquer work. The roof tiles are often finished with small circular tiles which bear the crest of the family associated with the shrine. The chrysanthemum is the crest of the imperial family, and the emperor is the head of the Shinto religion so I chose to use the chrysanthemum as a recurring symbol on my design. Here are some examples of my inspirations.
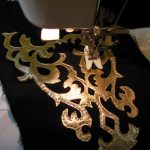
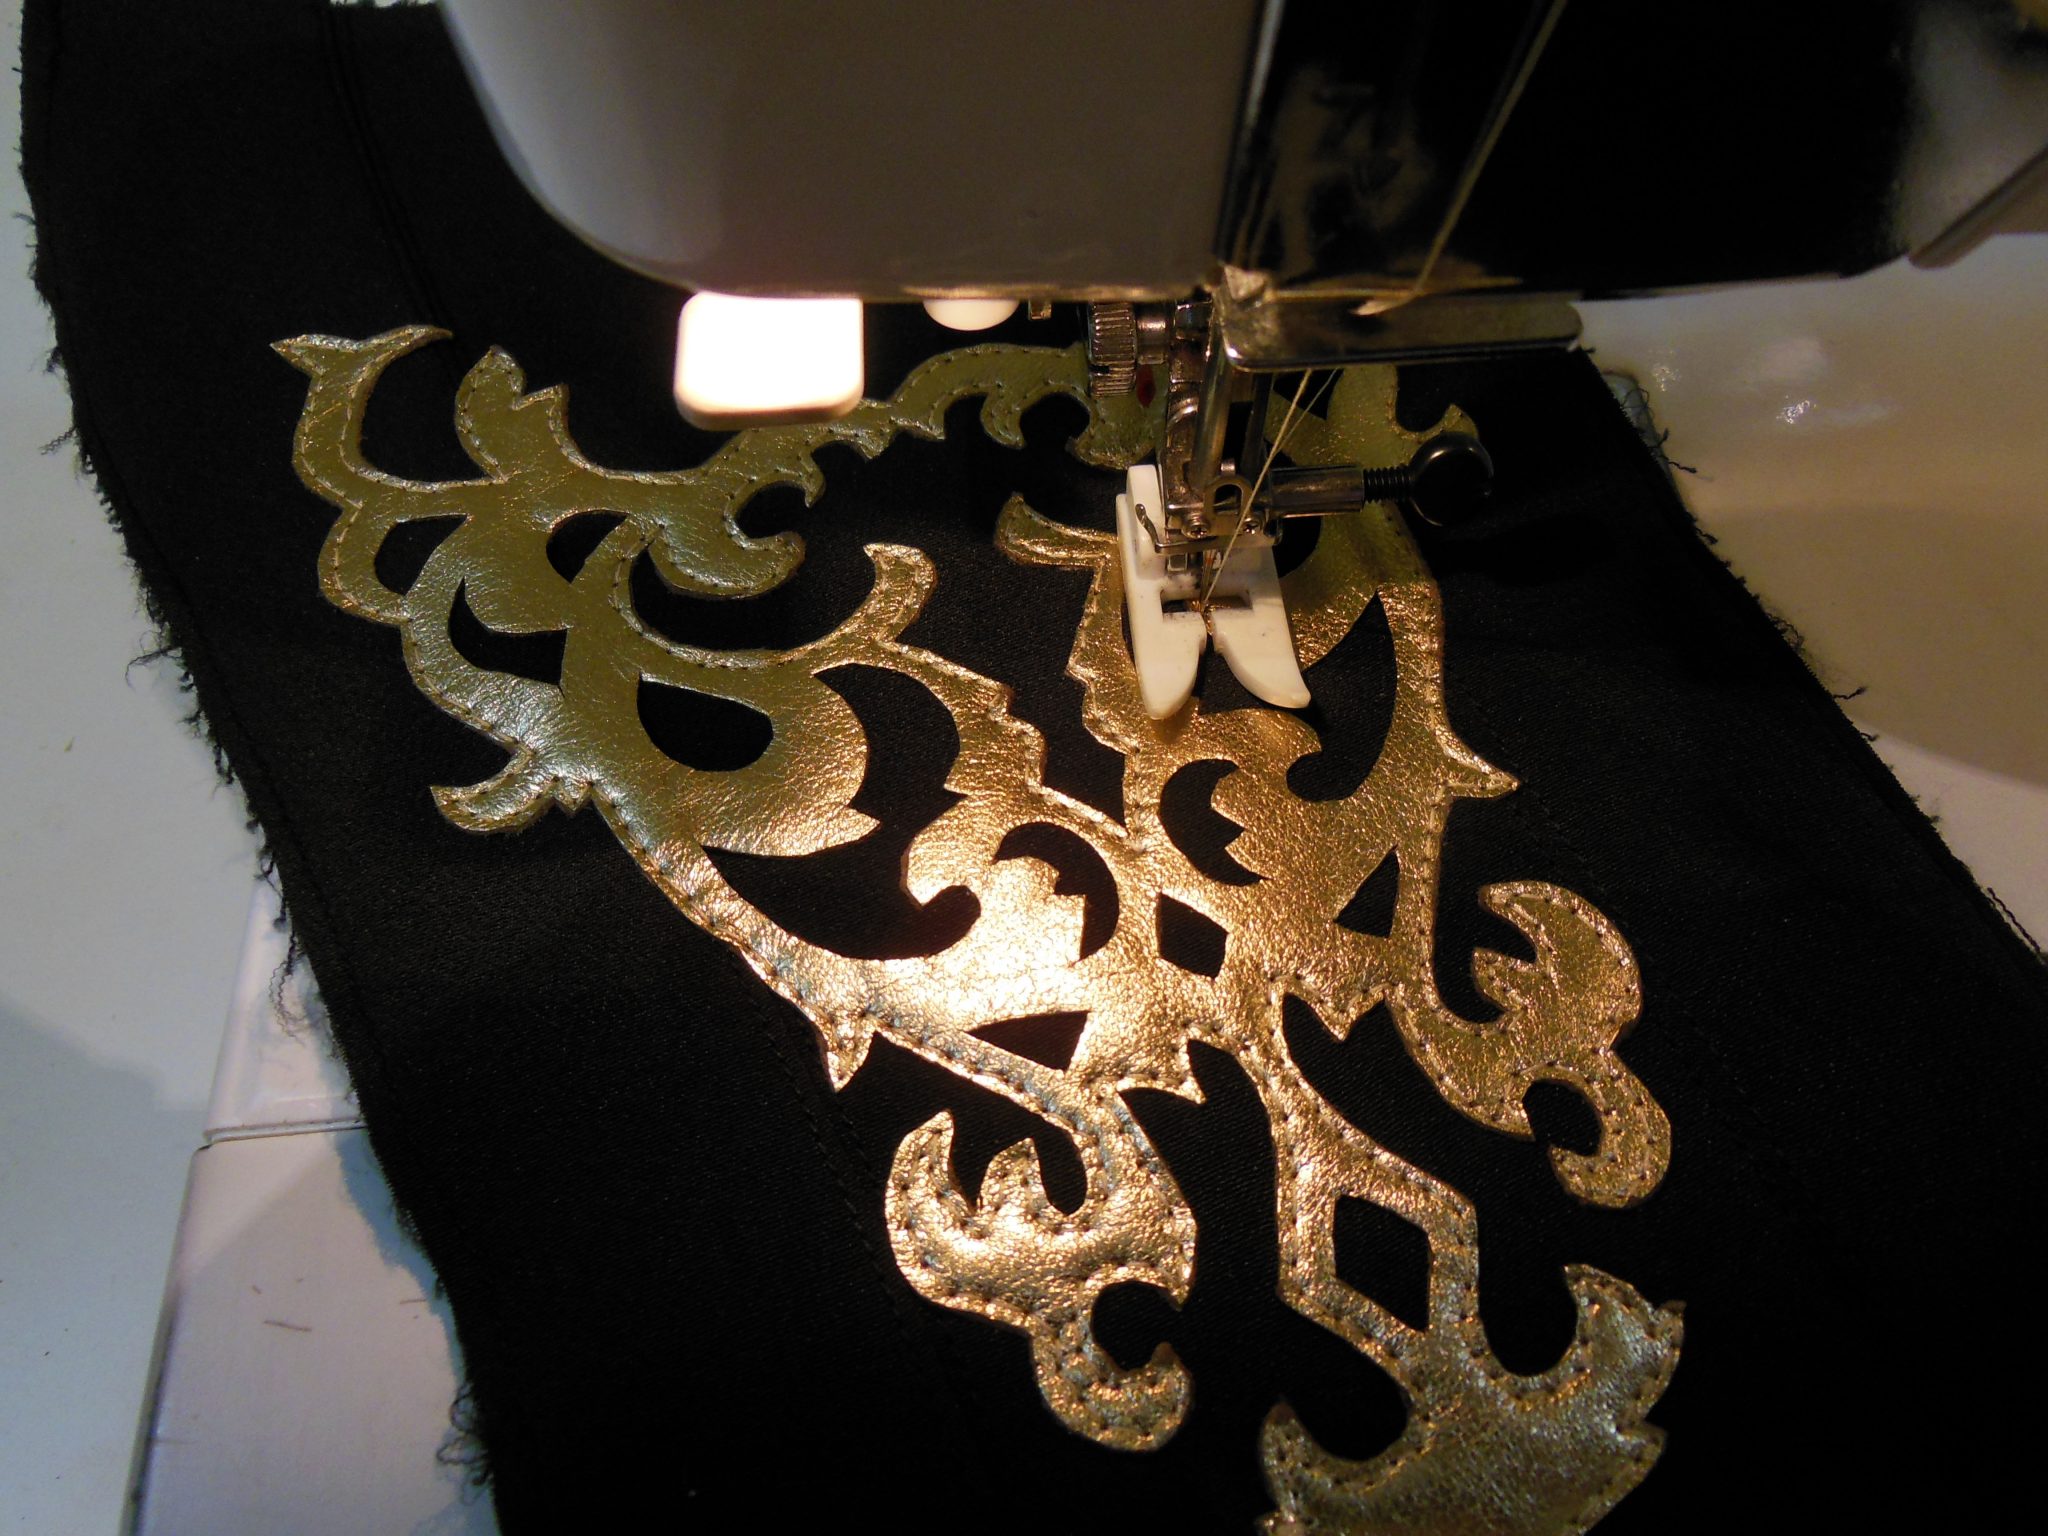
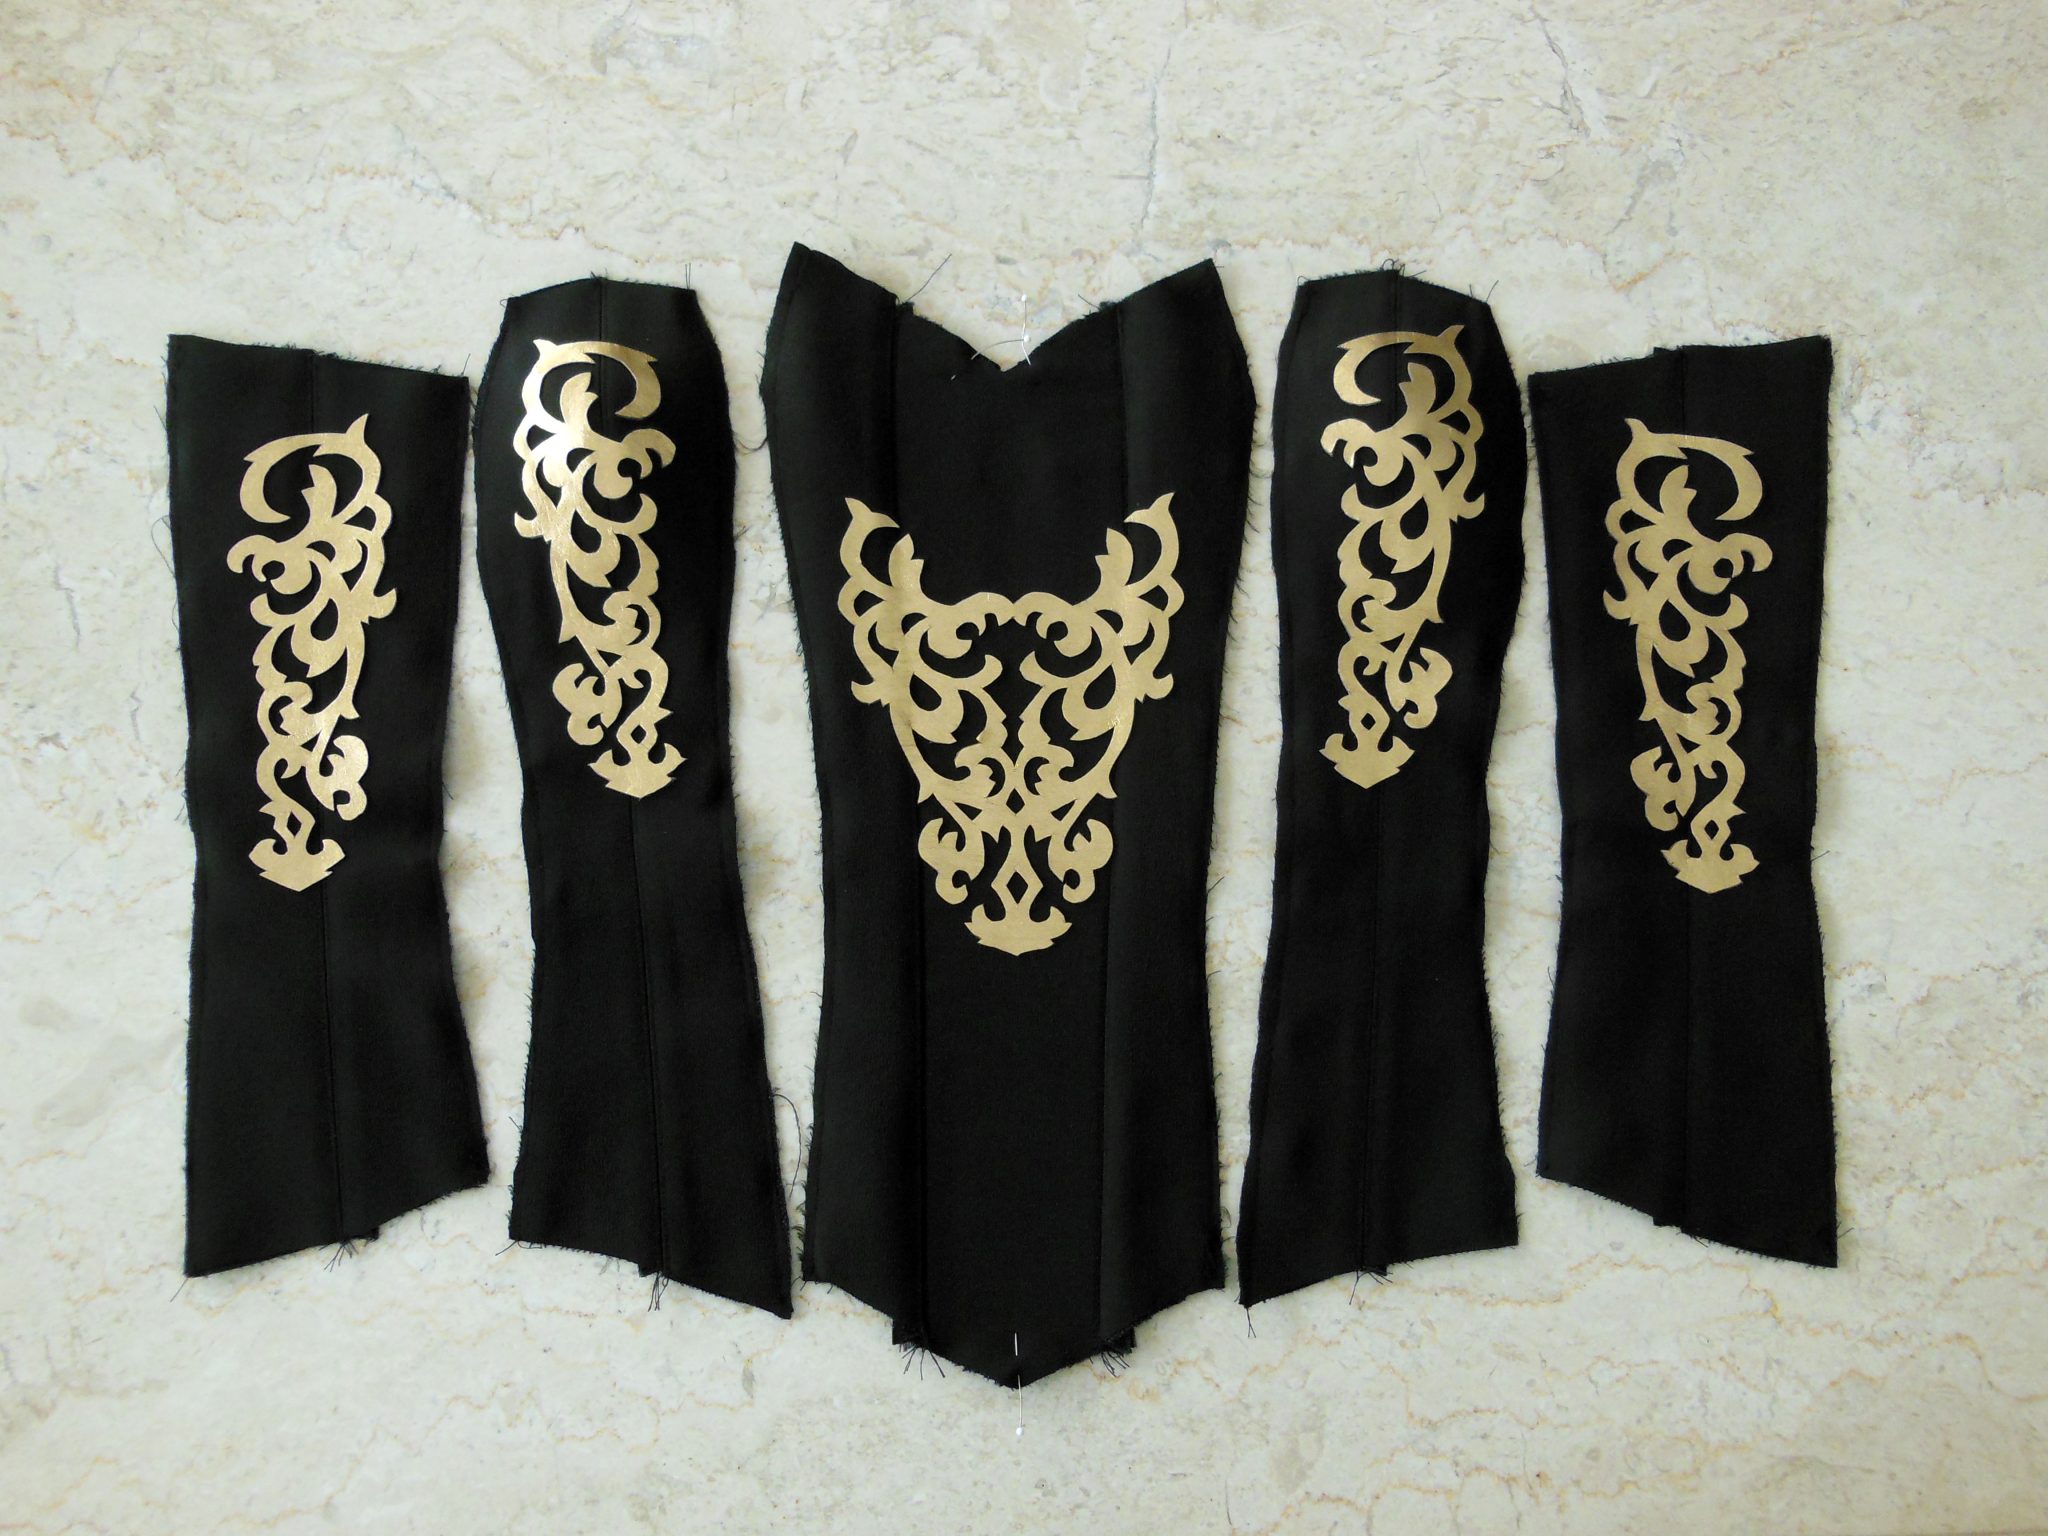
To incorporate my inspirations into my corset, I elected to use very simple, elegant lines for the paneling of the corset, embellished with gold leather applique to parallel the gold metalwork. The hip fins echo the roof tiling and wooden tiered roof supports, and the bust piece reproduces one of my favourite lintel carvings. I was inspired to use a vintage black silk kimono I brought home from Japan for the fabric, using material from the sleeves for the corset and the embroidered lower section of the kimono for the skirt.
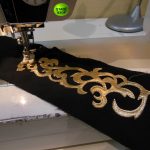
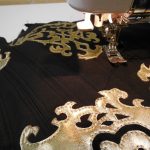
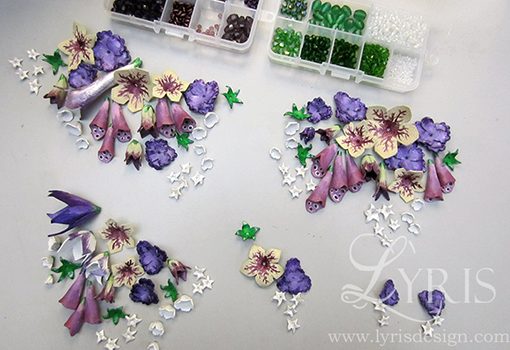
The pattern was drafted to fit my model, with 17 panels to achieve a smooth silhouette. I made a toile and had several fittings. The silk was reinforced with interfacing and roll-pinned to coutil before sewing each panel to the next. The appliques were hand cut from gold leather, mounted with spray adhesive, then painstakingly sewn by machine.
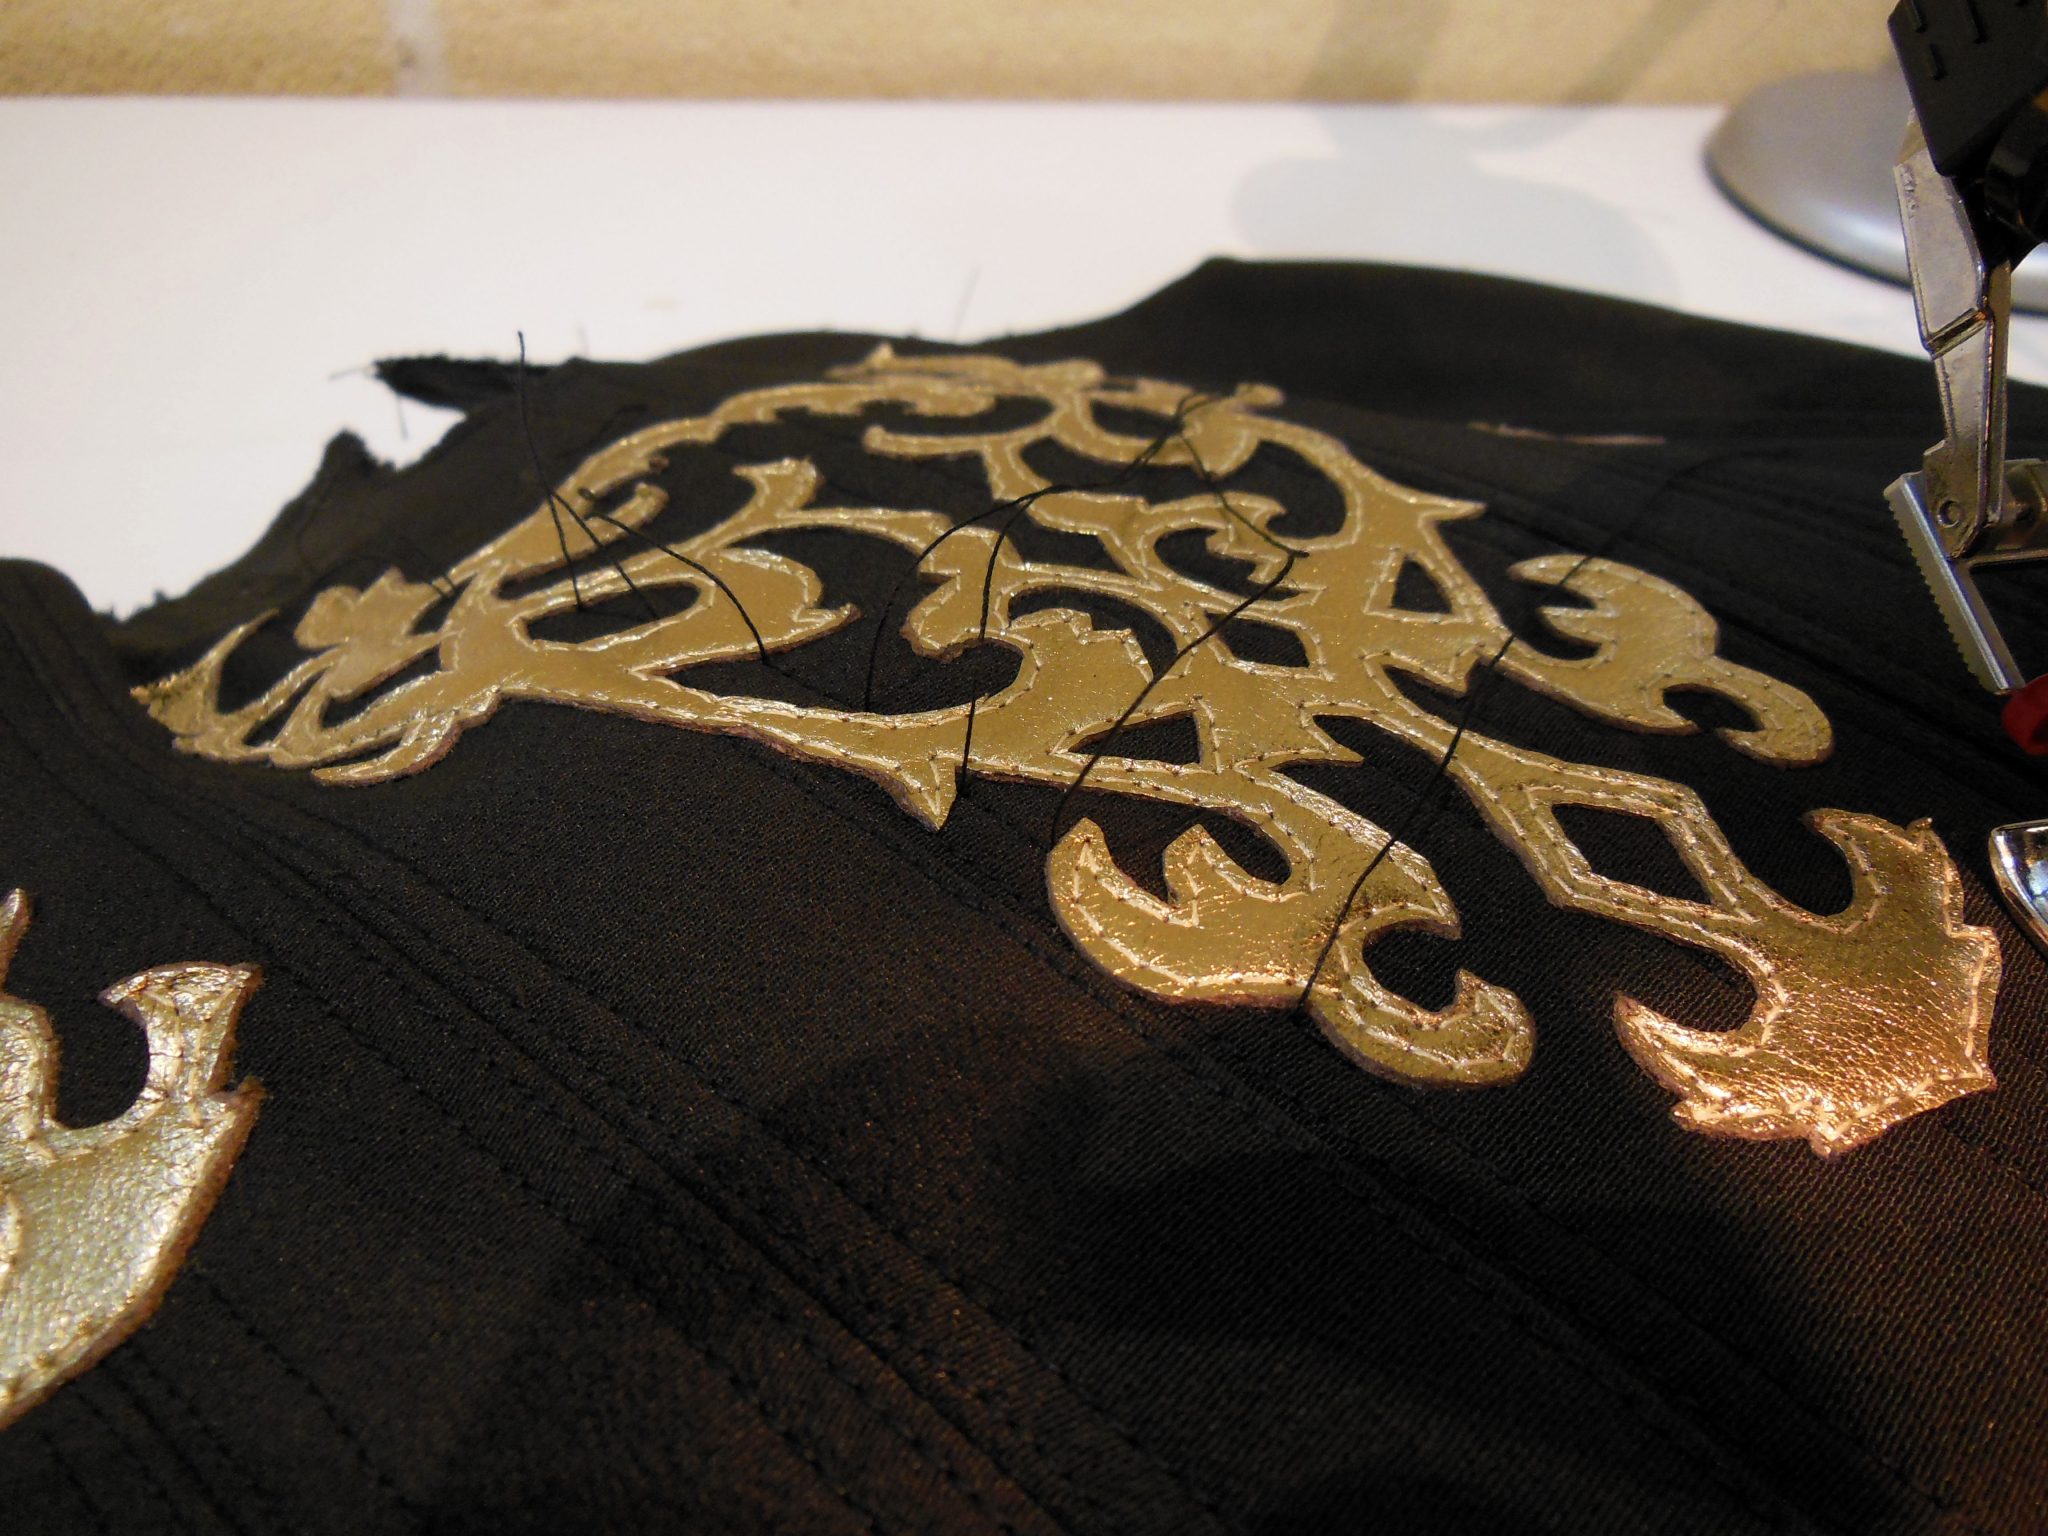
The boning channels were premade coutil channels, with a total of 23 bones. To stitch the channels I needed to stop stitching whenever the channel intersected with the applique, pull the threads to the back and hand knot them, and then hand sew the channel where it was not stitched. Lots of work, but it keeps the channels and applique looking clean and sleek.
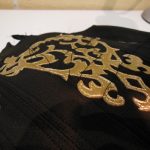
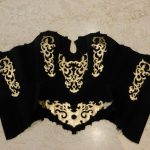
For the first time I tried prebent solid steels over the bust, and was very happy with the result. It gives a lovely cupped bust. The corset has a cotton floating lining, and hand finished silk binding. I sculpted a foam and thermoplastic chrysanthemum crest for the centre front and there is a boned, suspended modesty panel beneath the lacing.
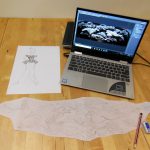
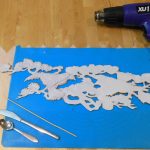
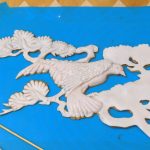
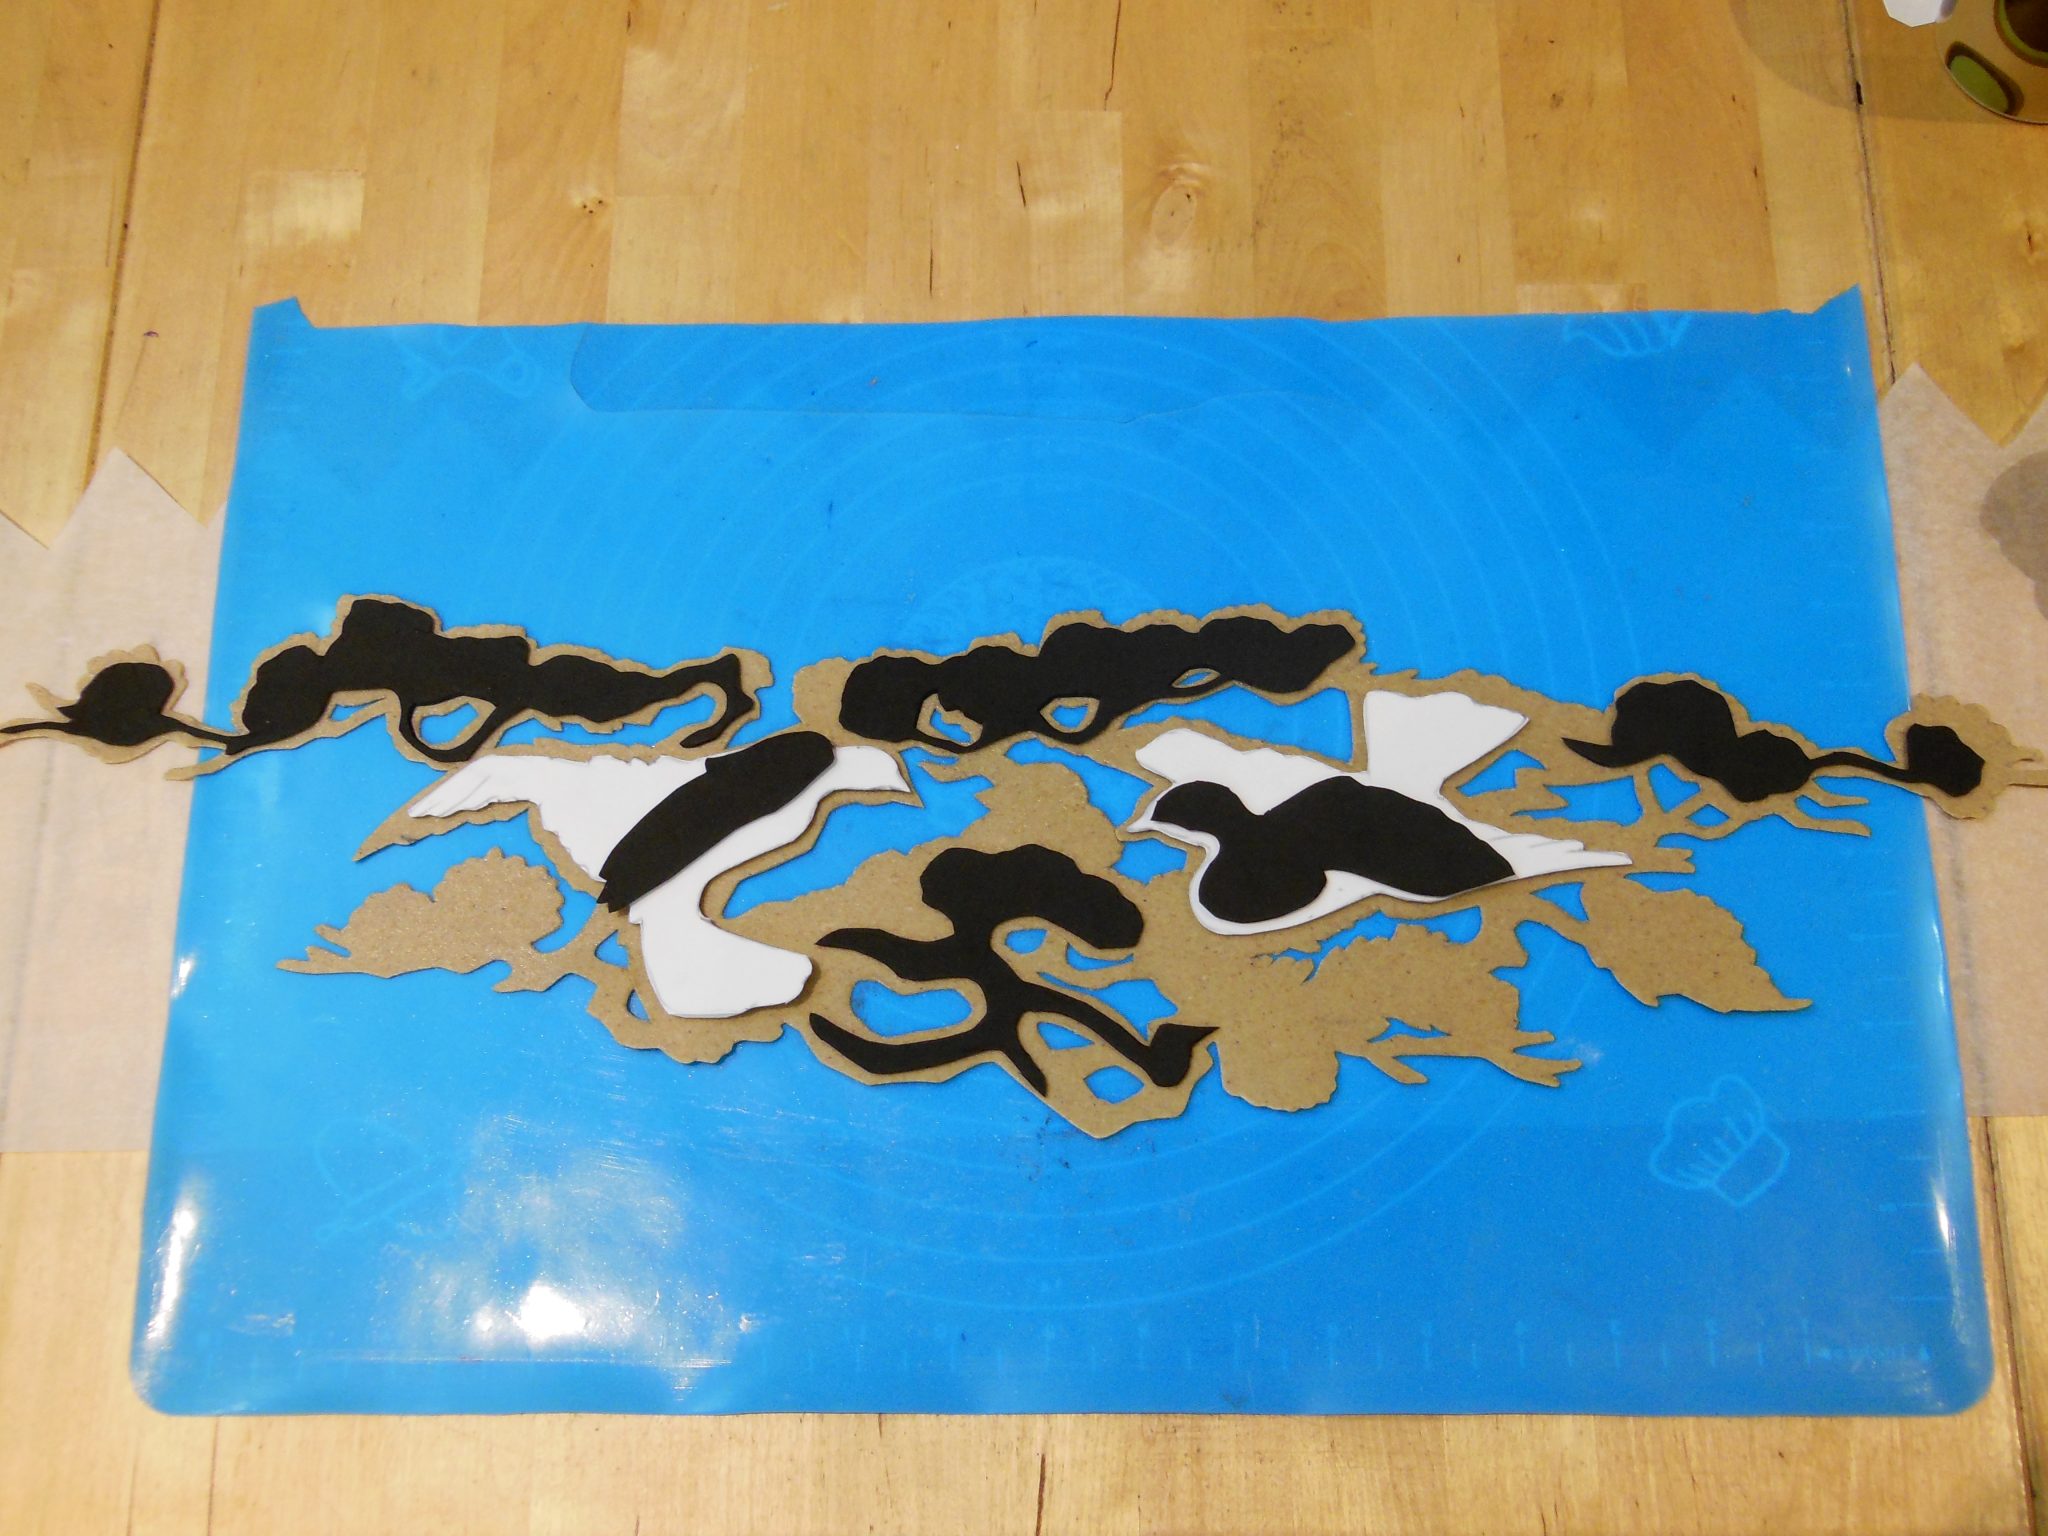
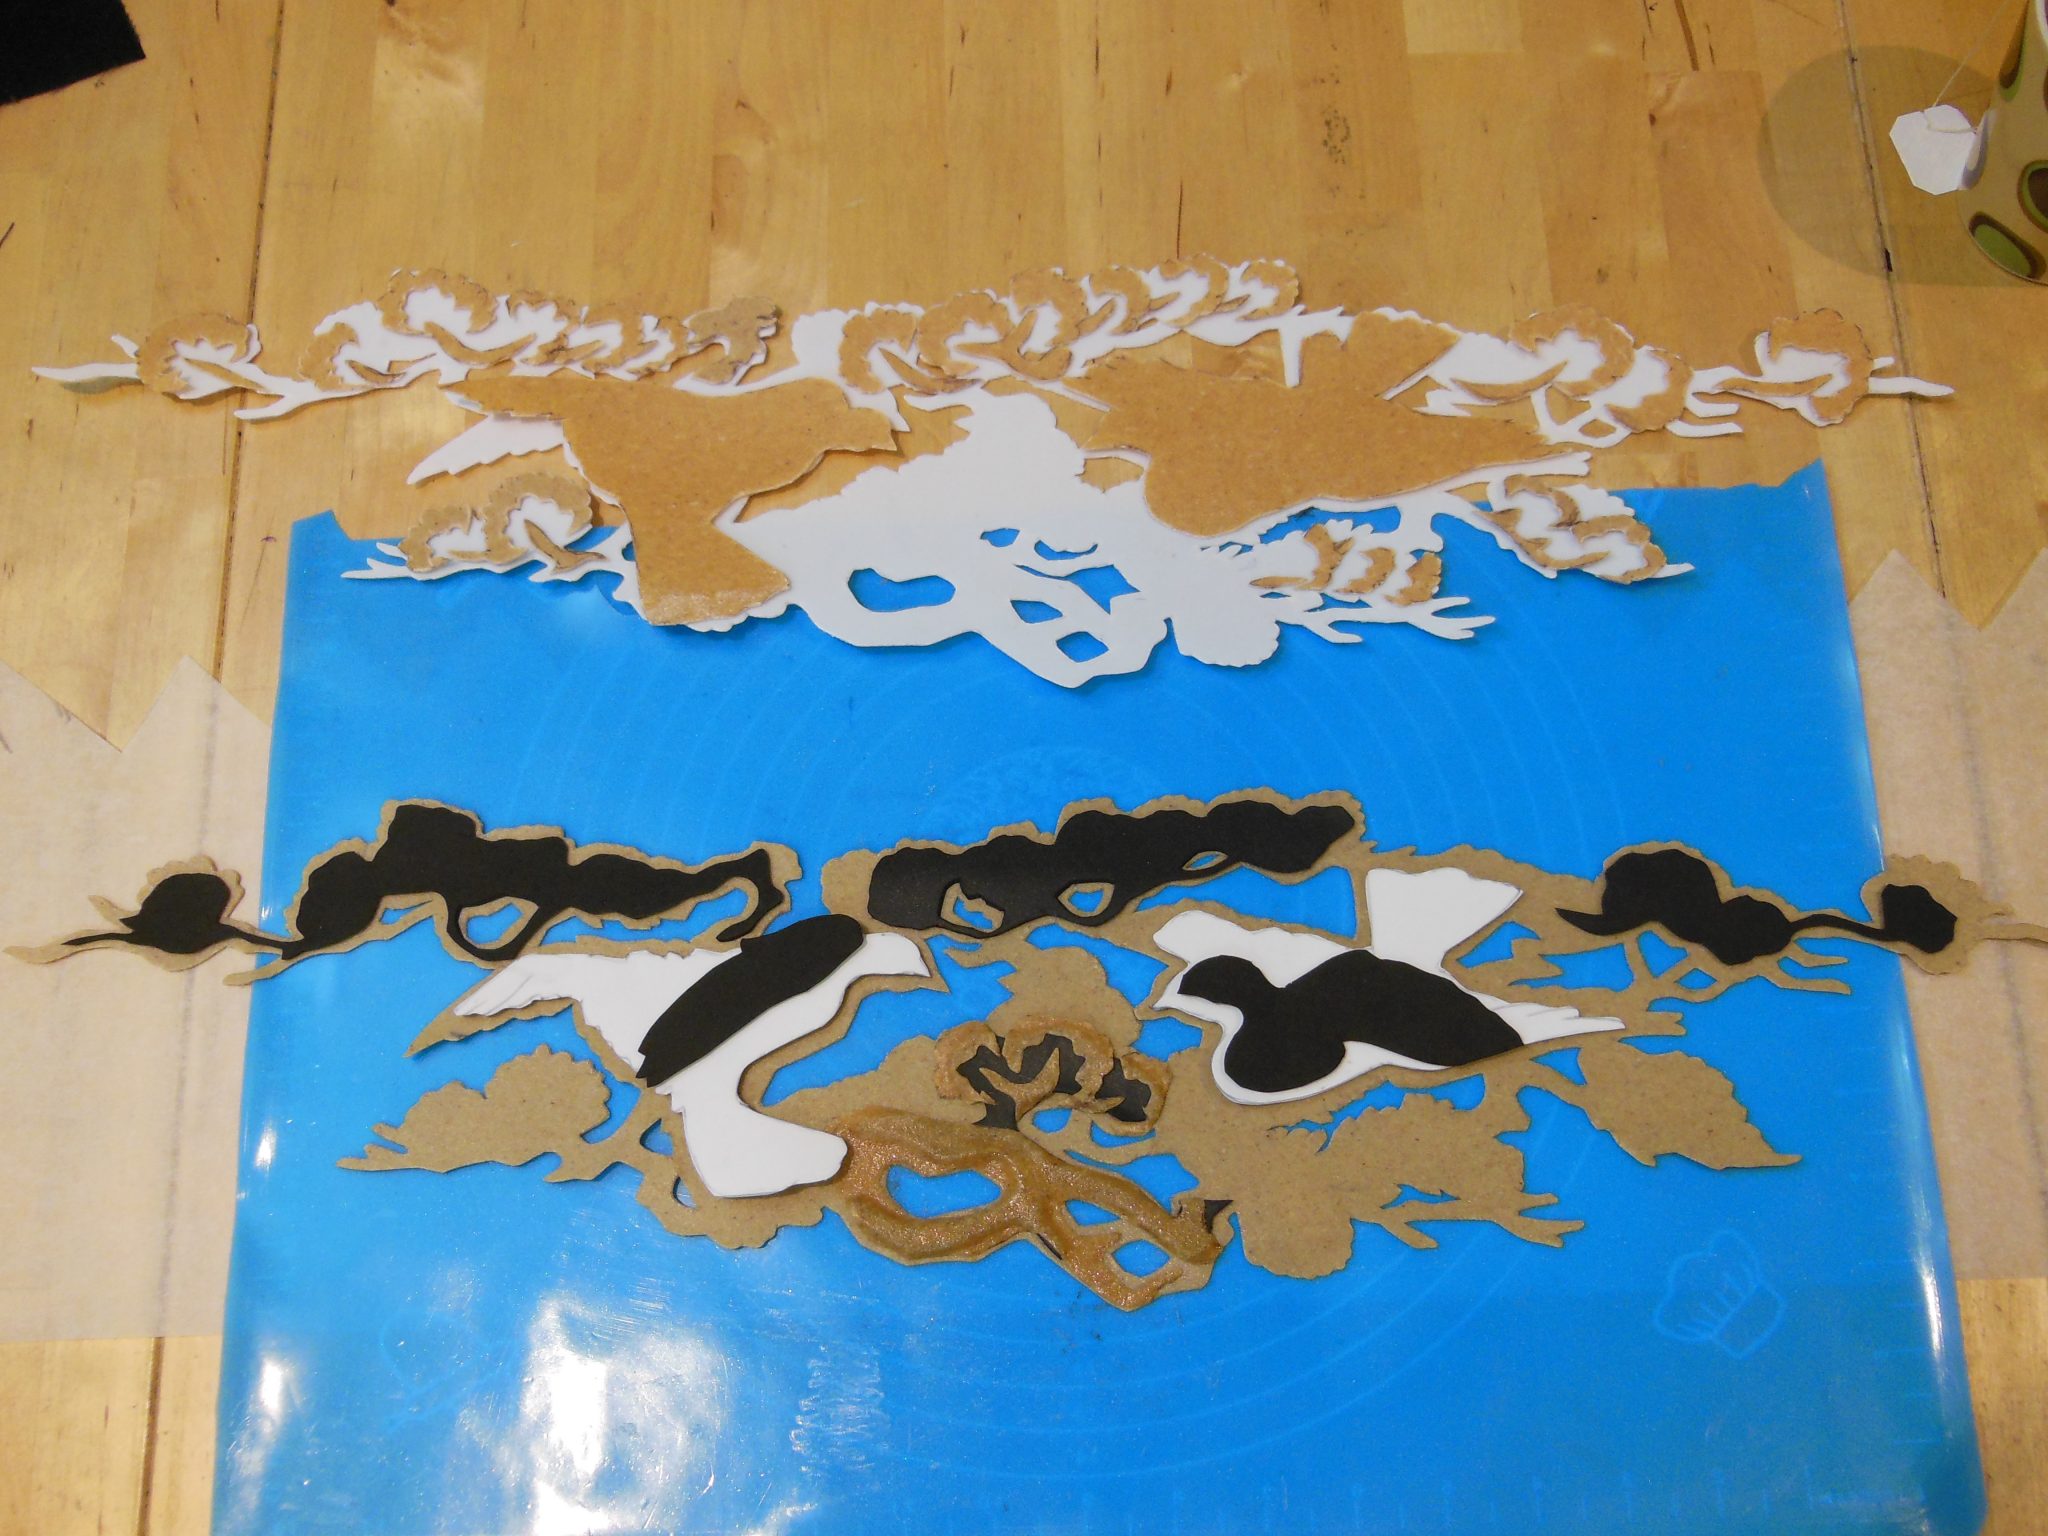
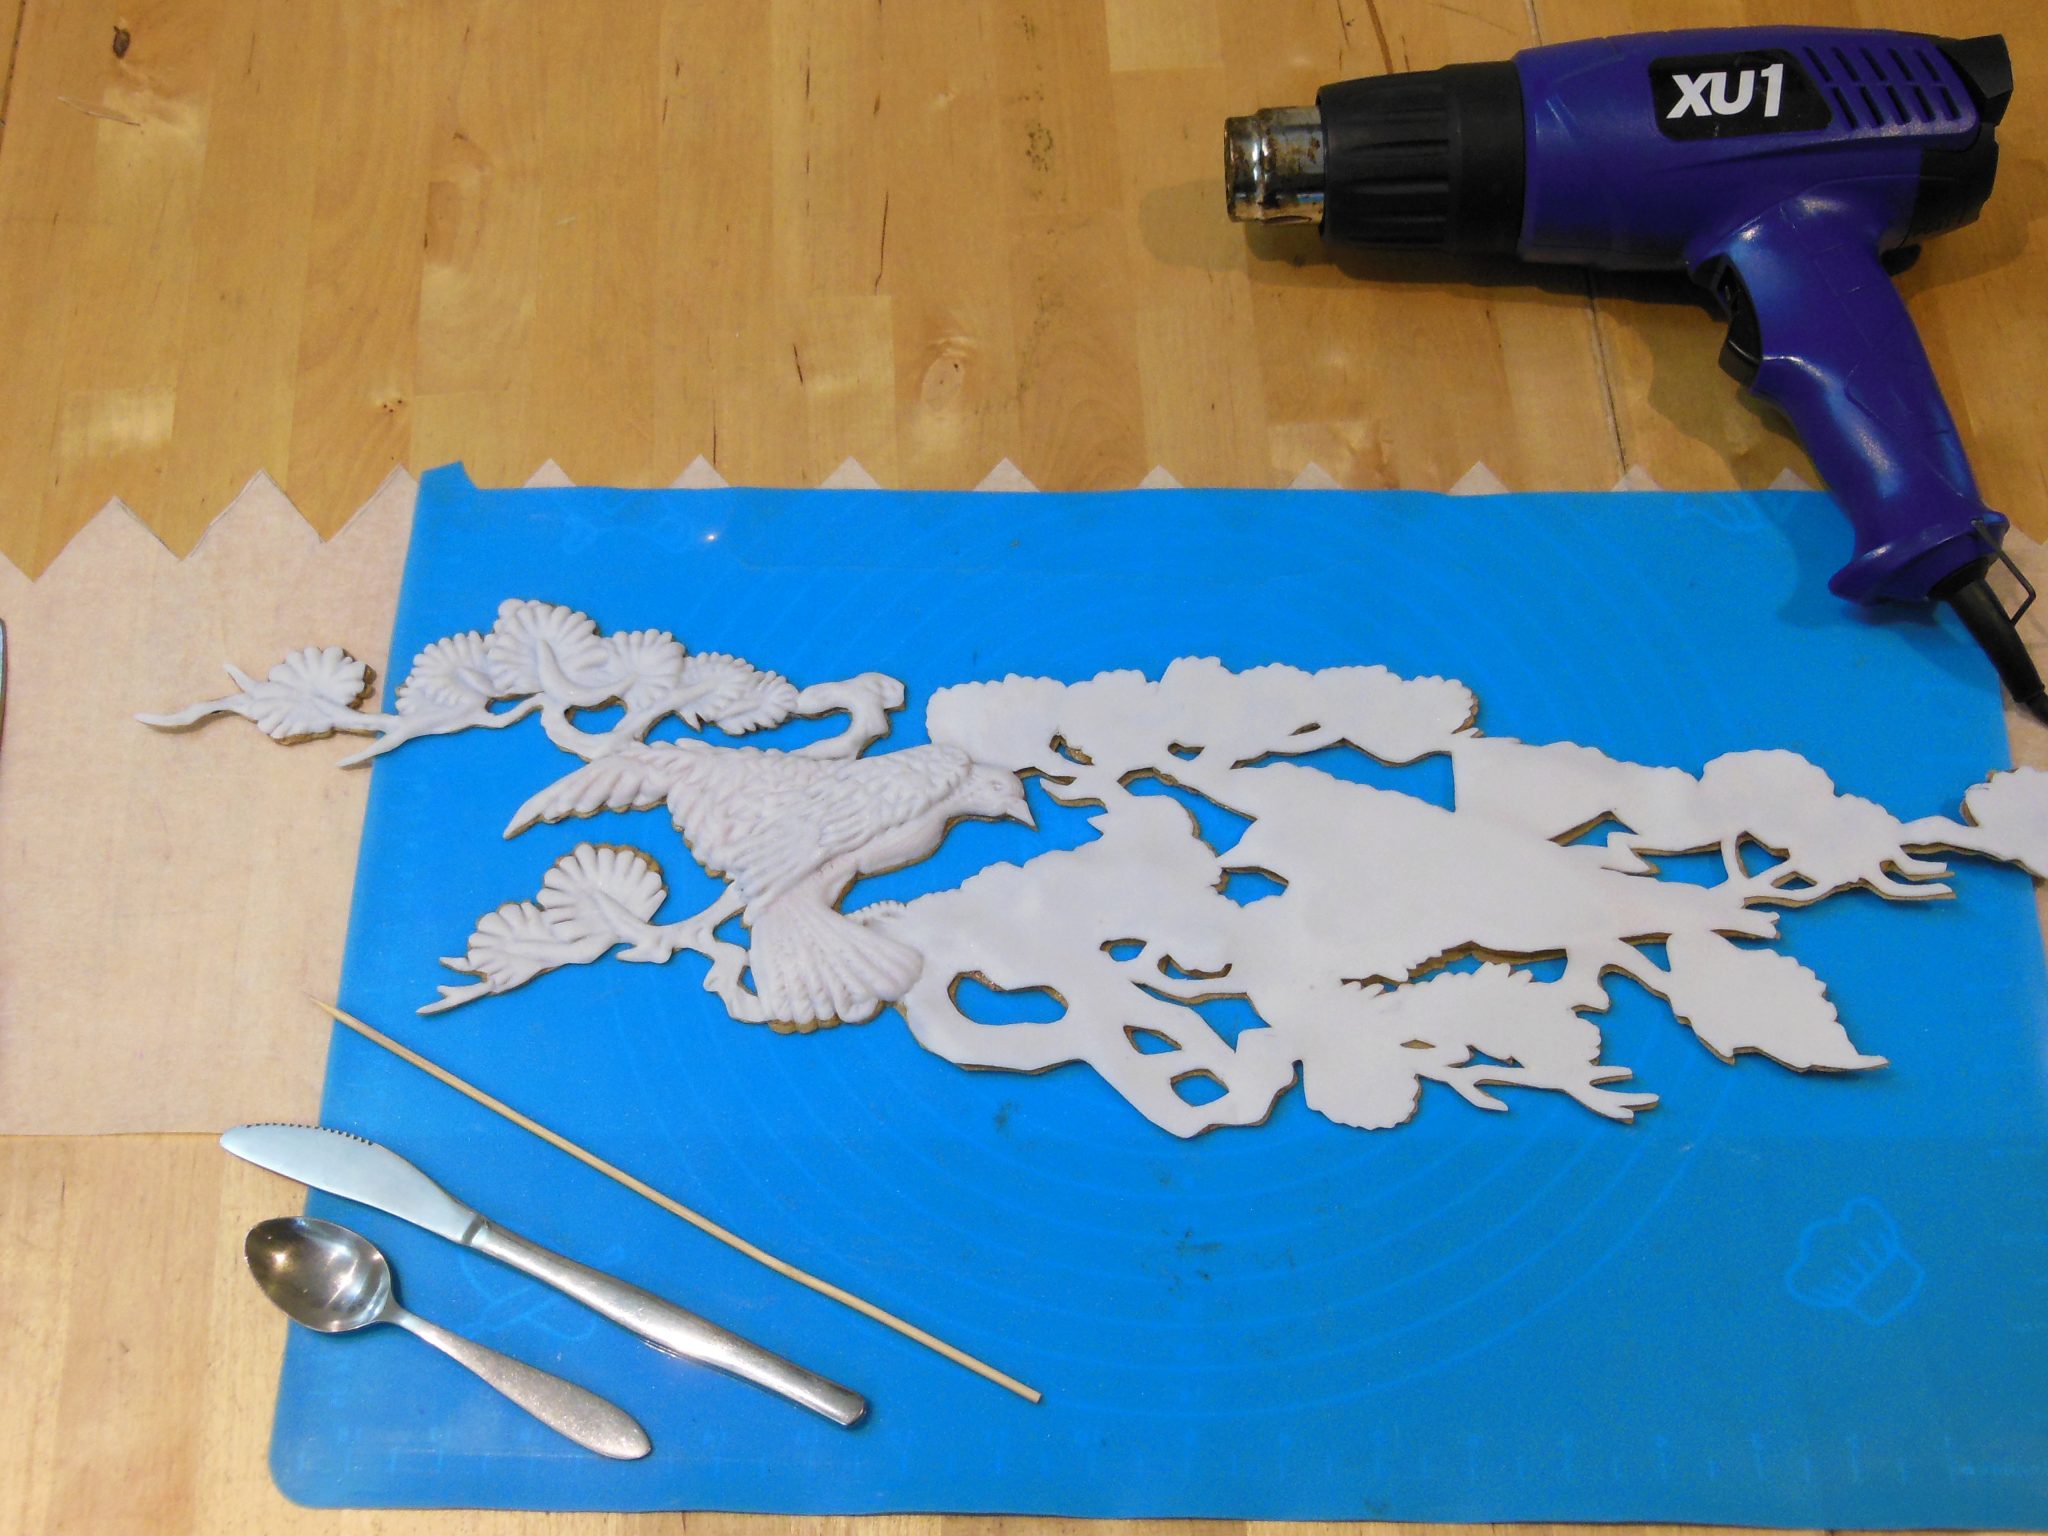
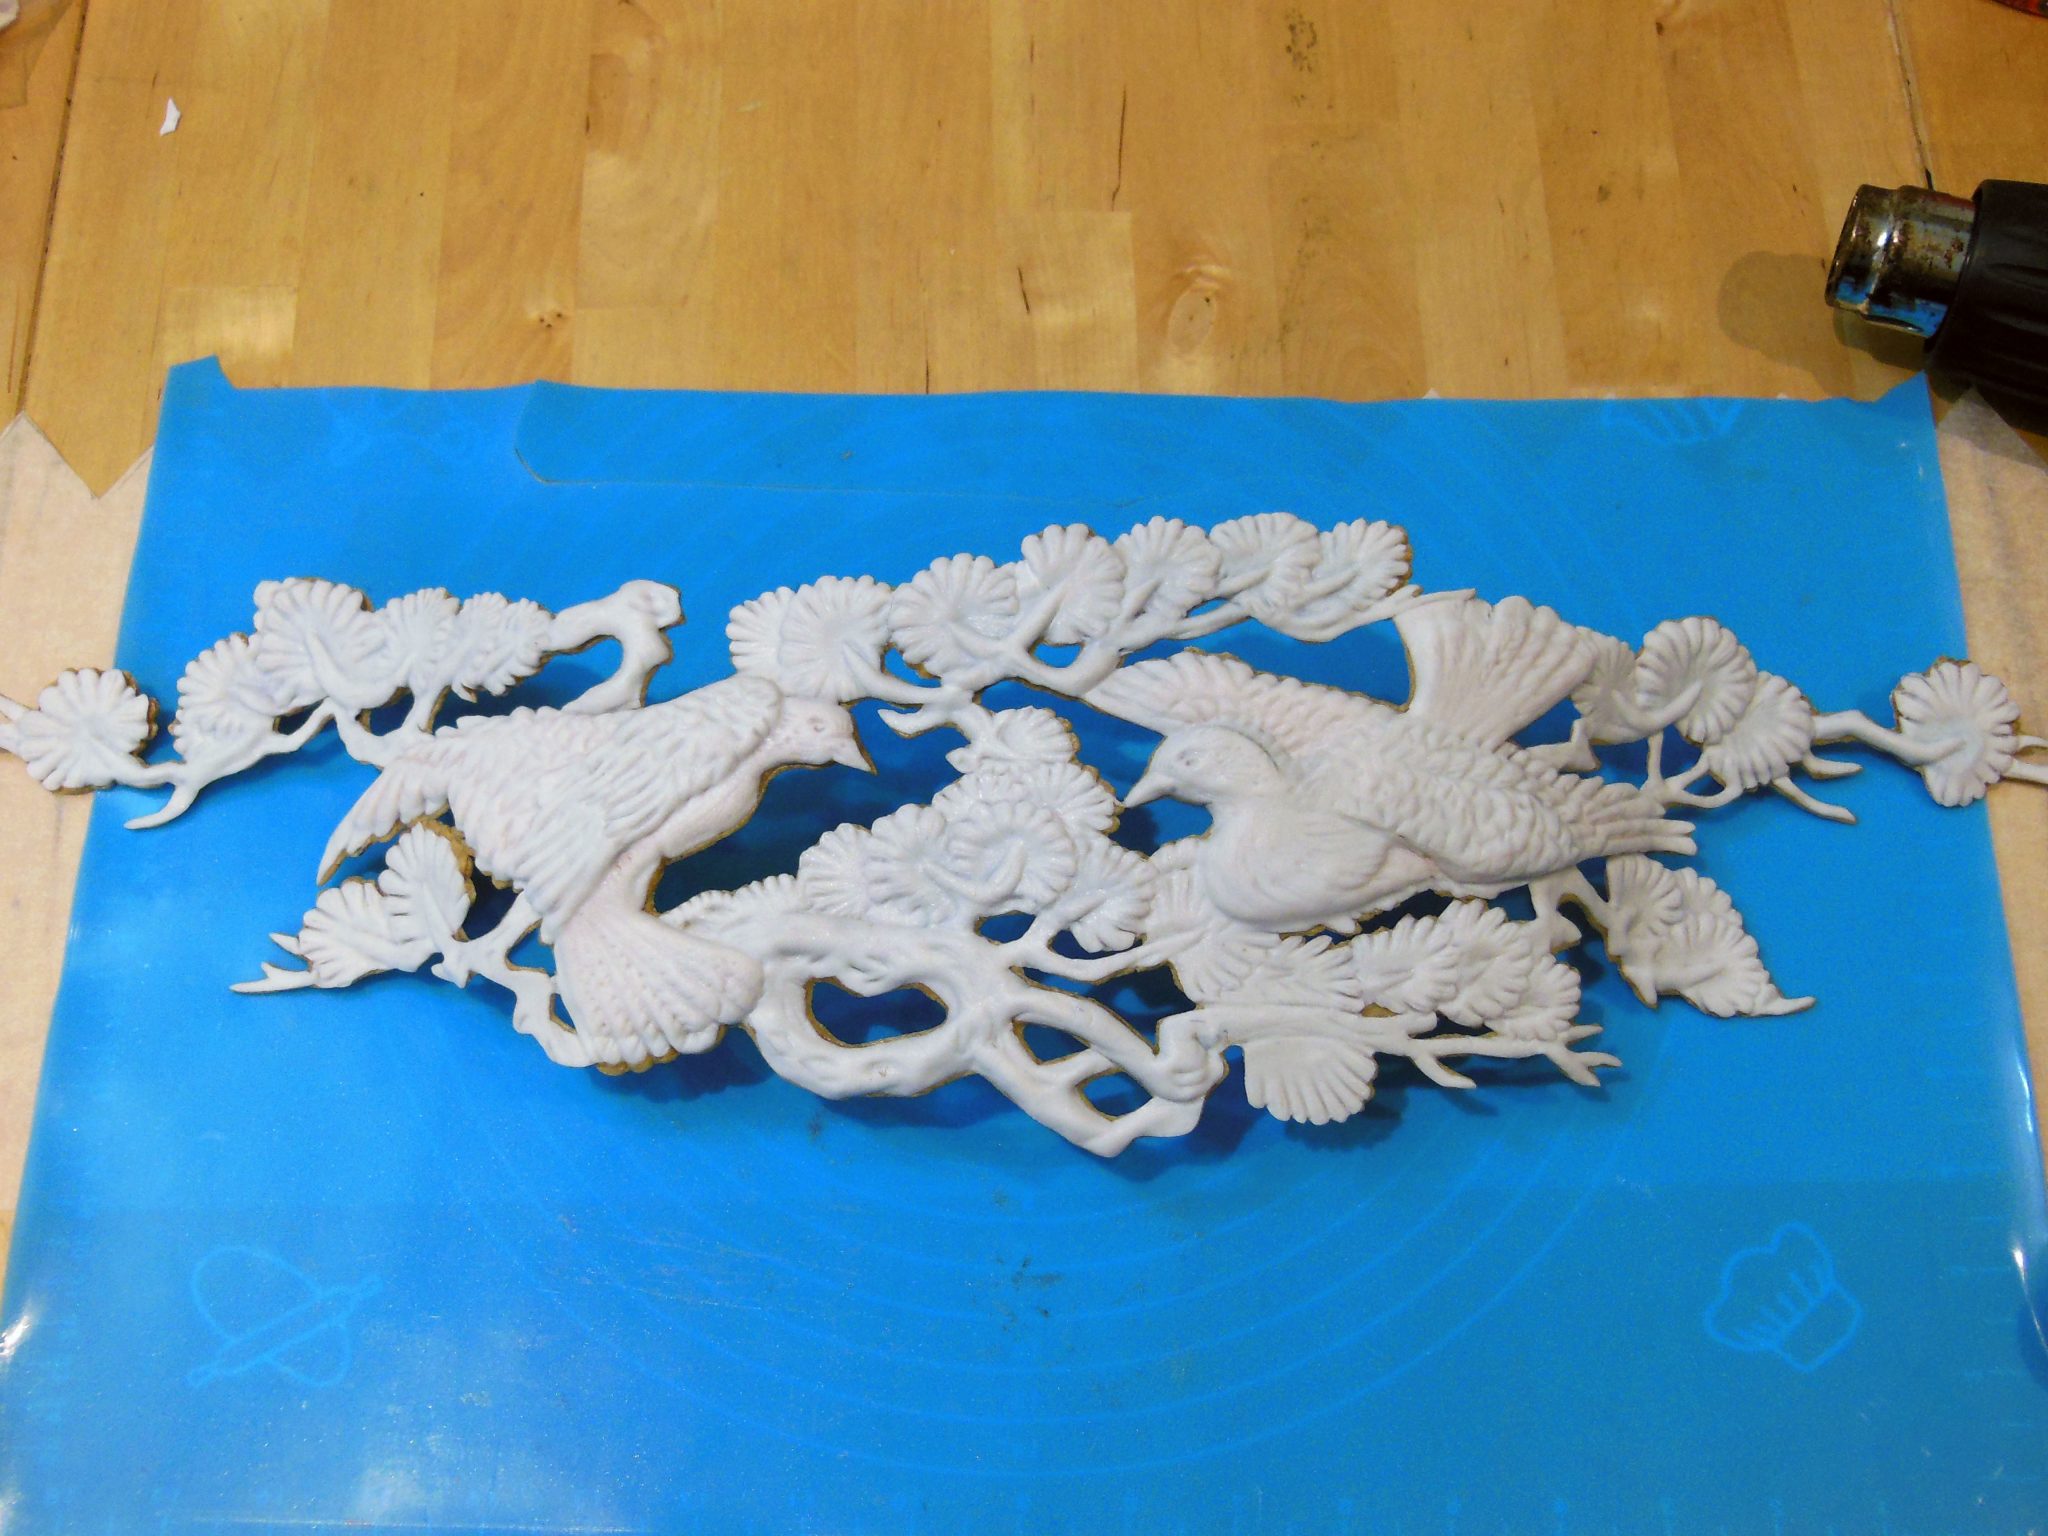
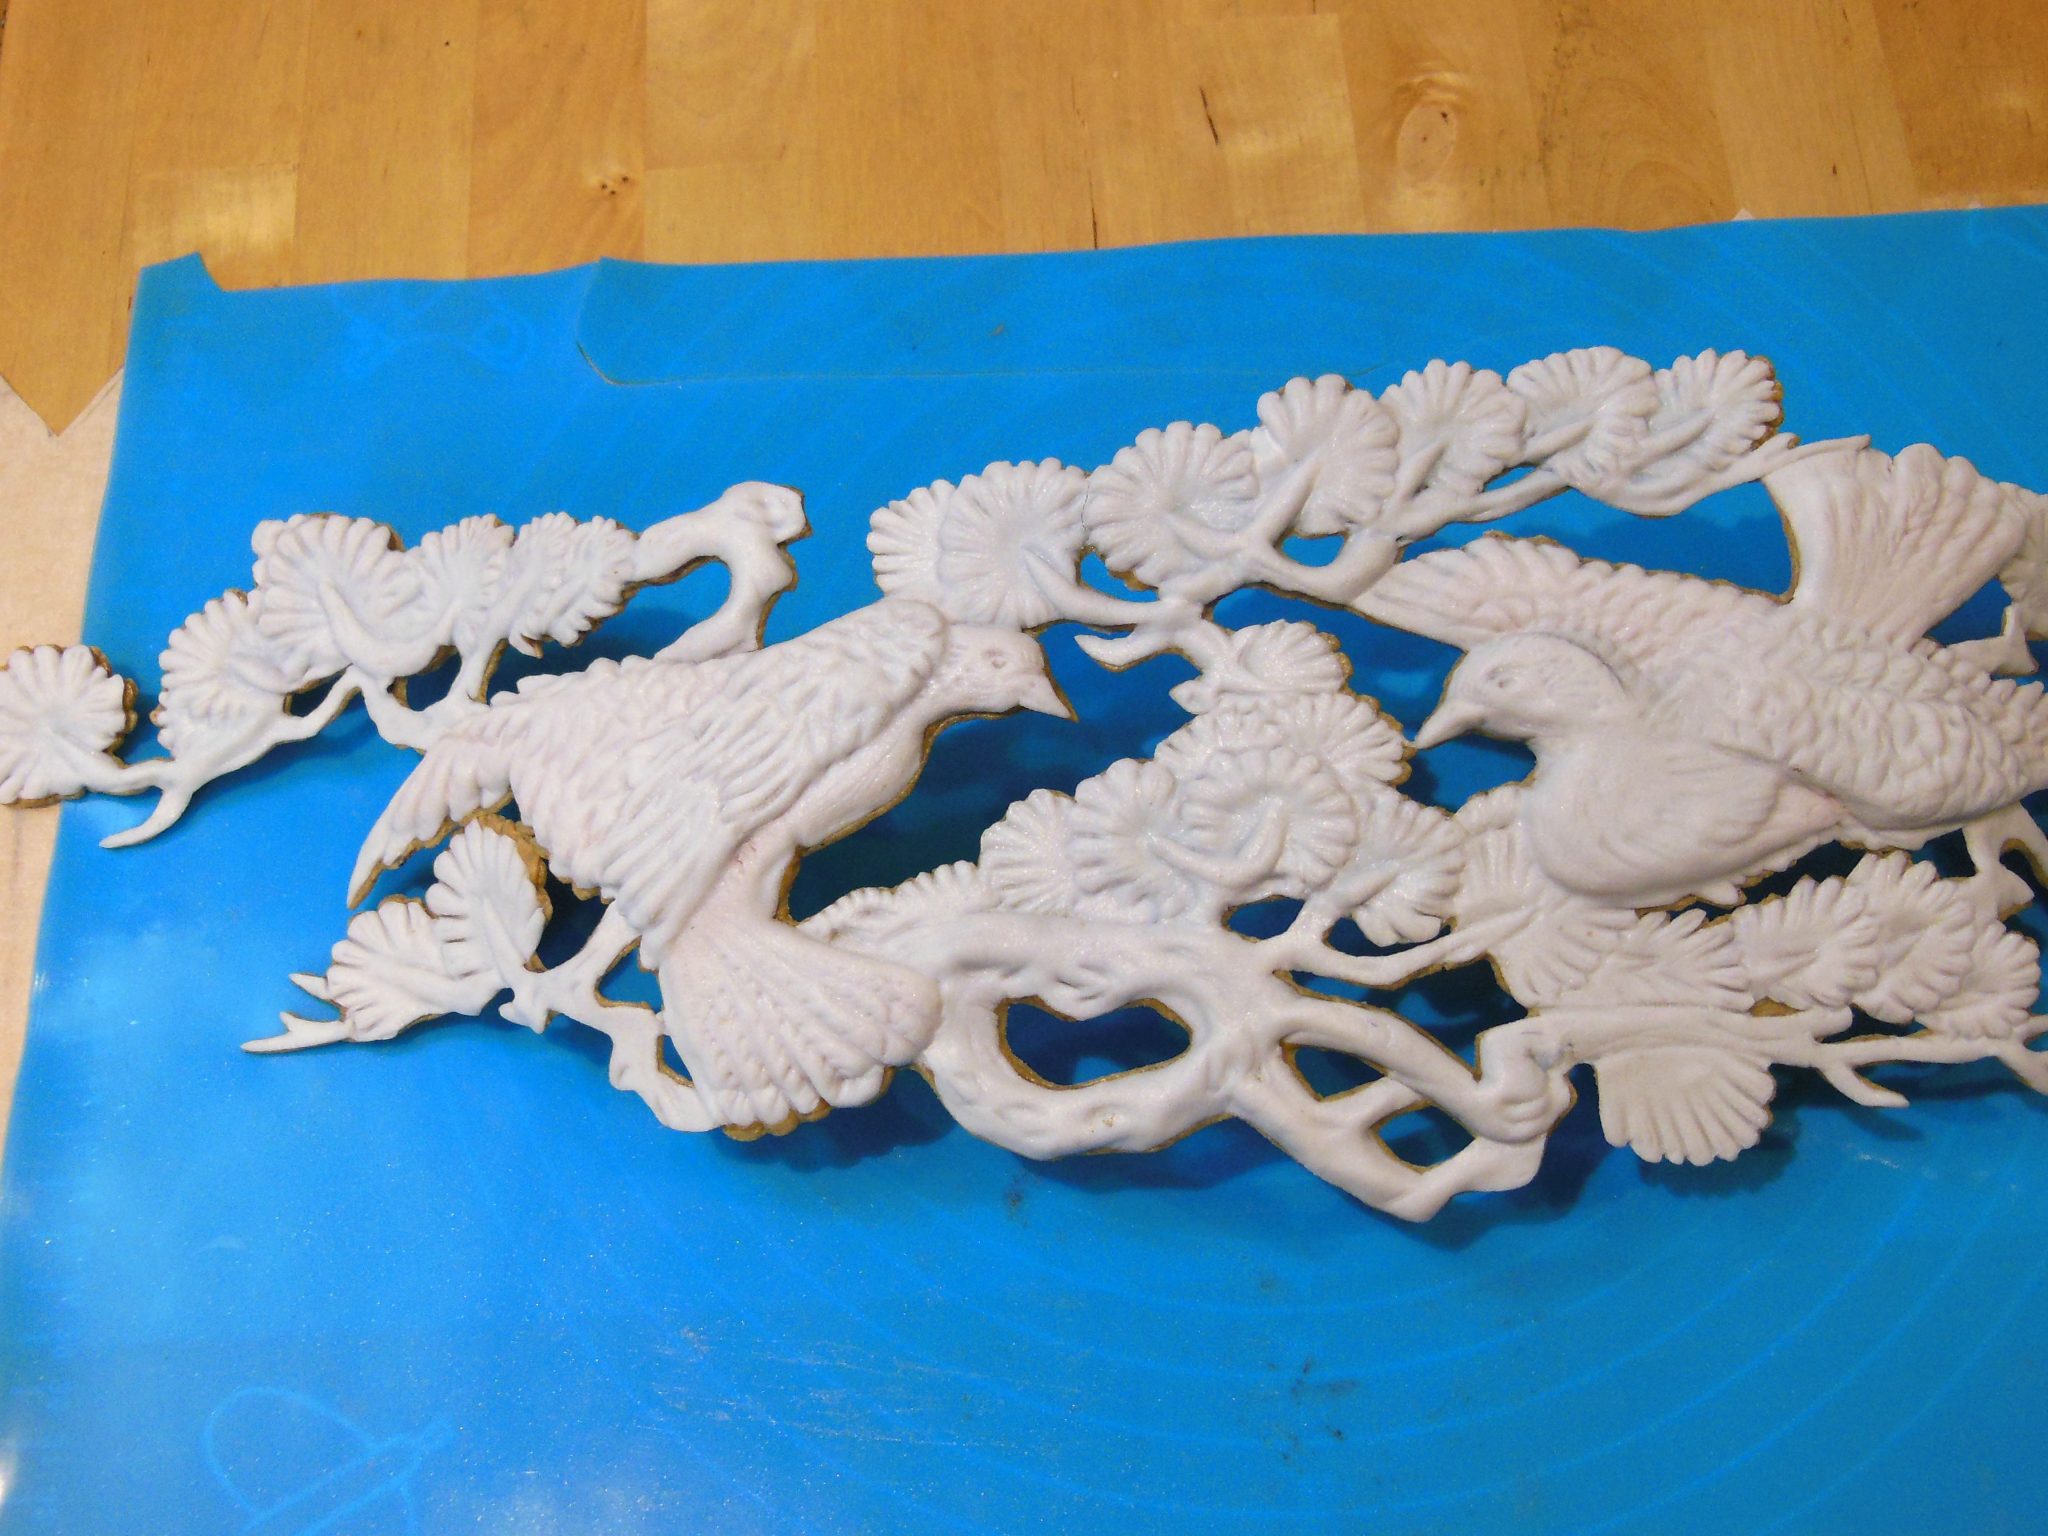
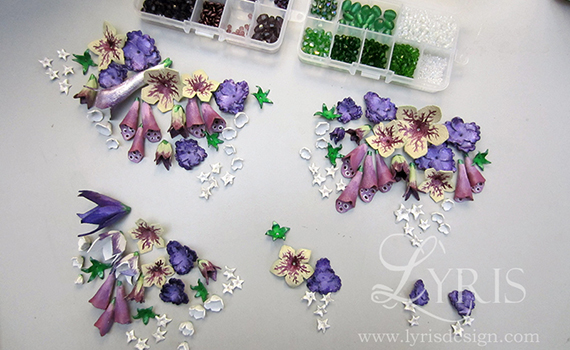
The bust piece was sculpted from many layers of thermoplastic and foam with a heat gun, a butter knife, teaspoon and skewer, proving that you don’t need professional tools to get a good result! It was then painted in many layers to resemble a wooden carving. Here are some step by step photos to give you an idea of what went into sculpting it.
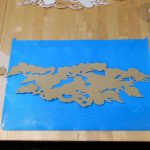
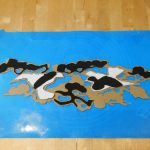
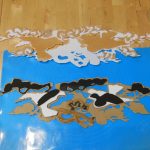
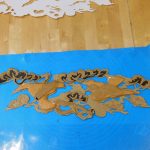
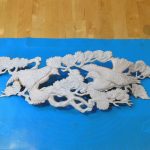
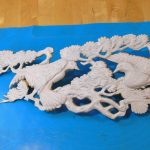
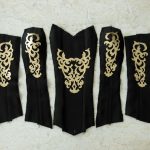
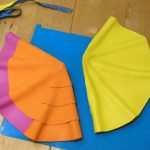
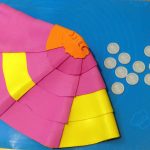
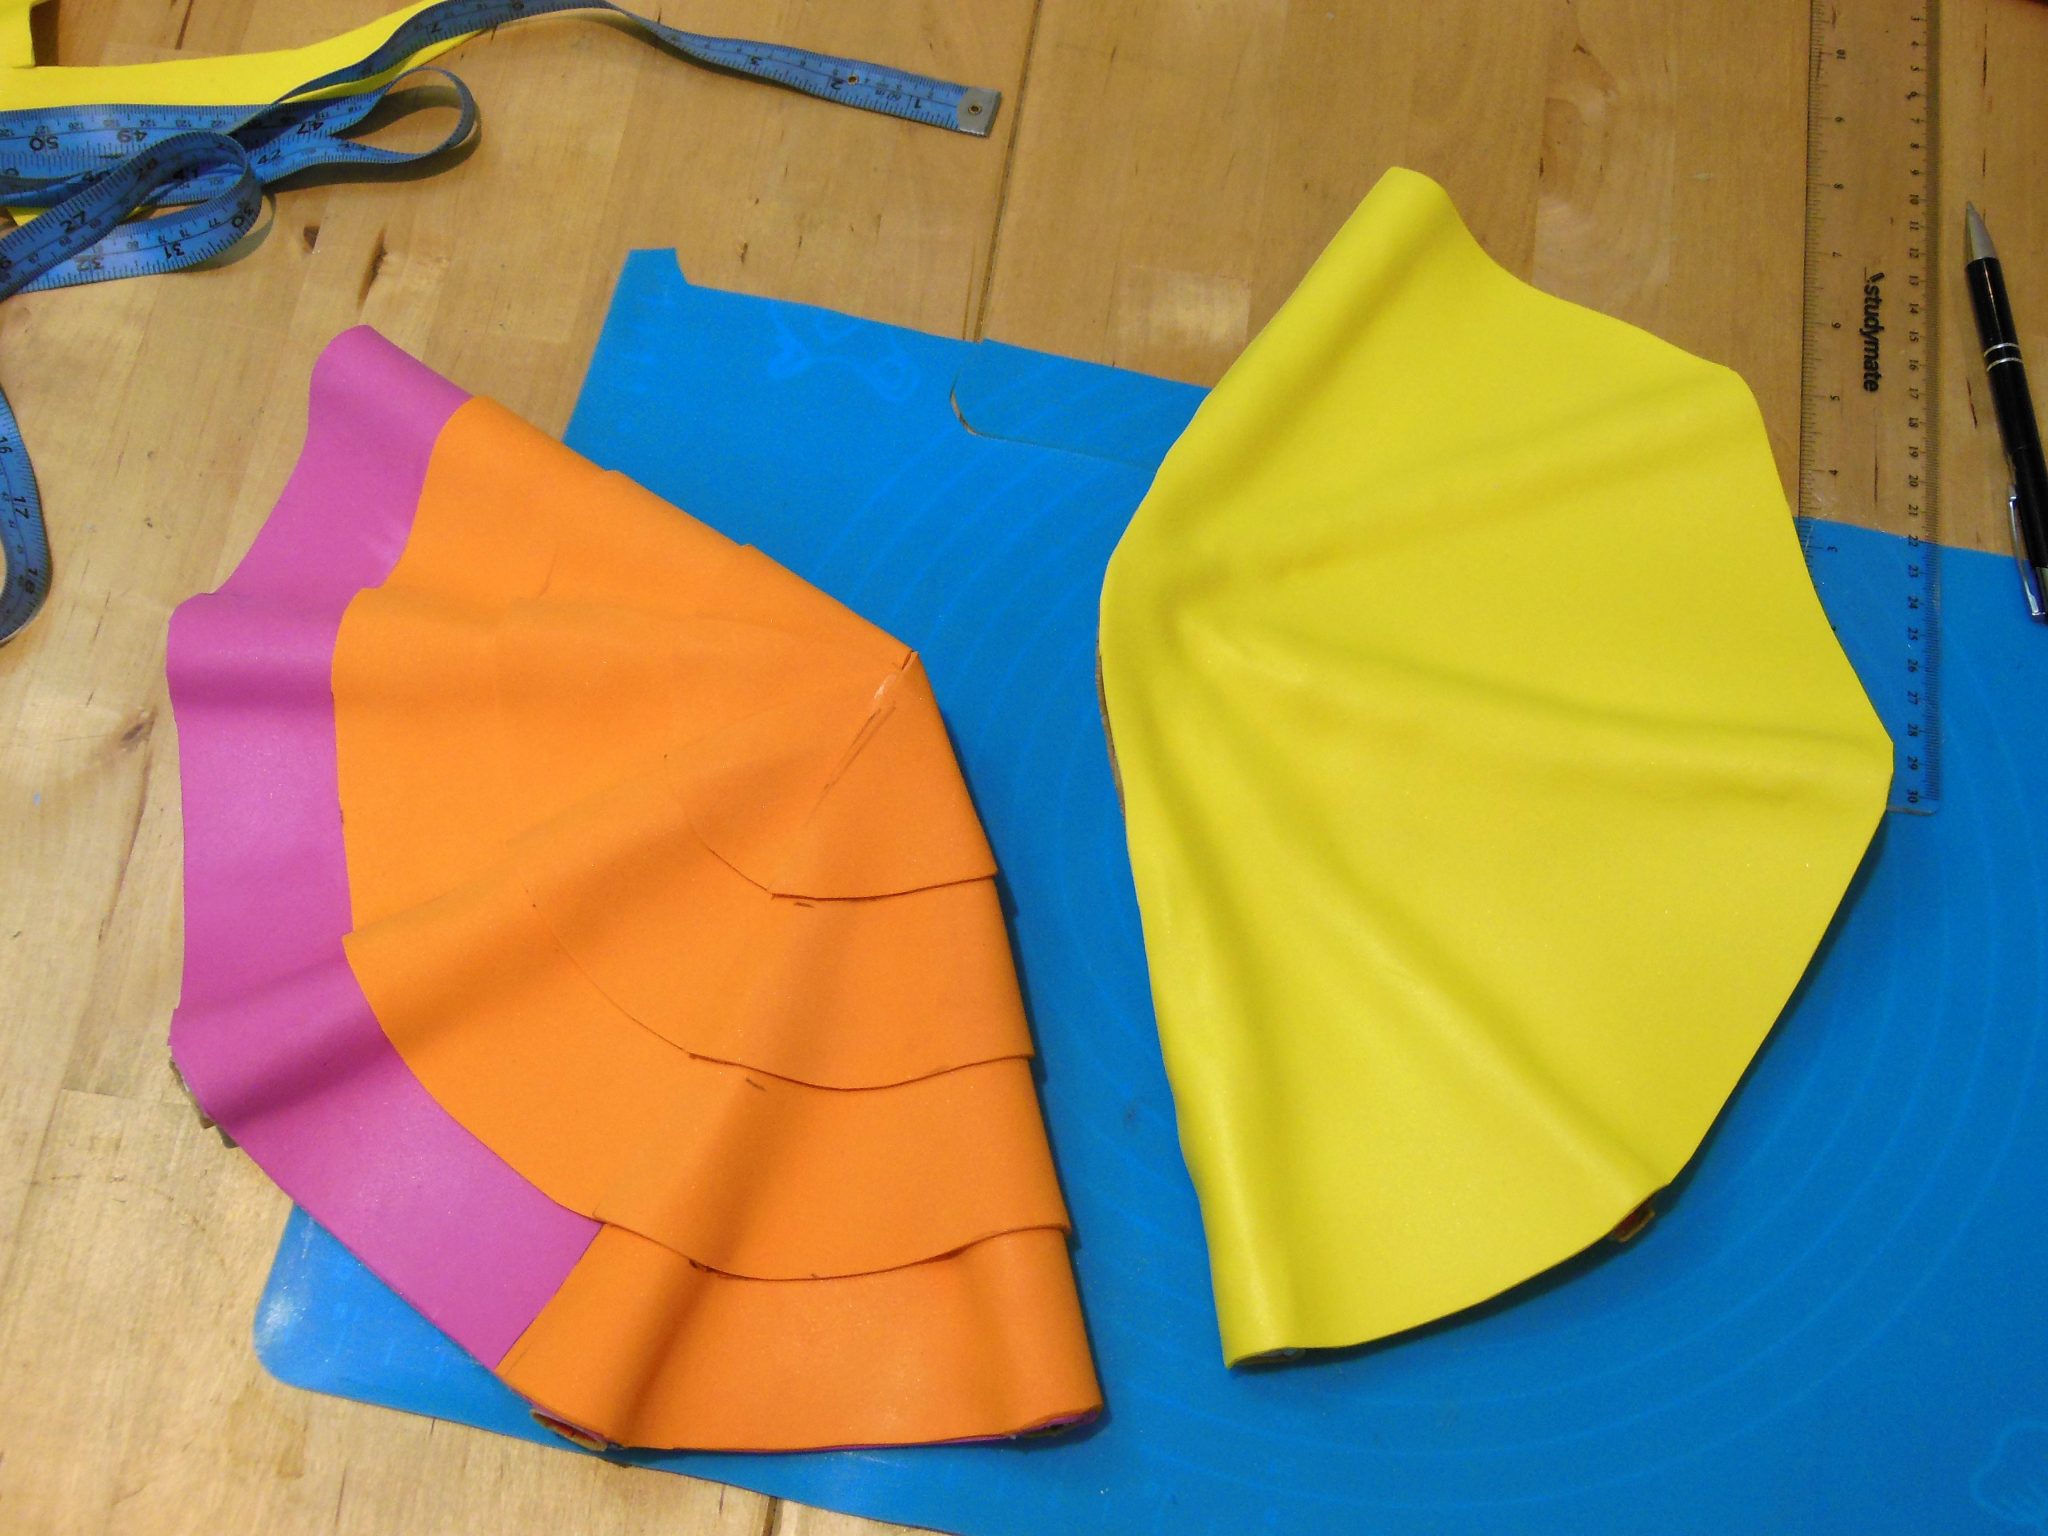
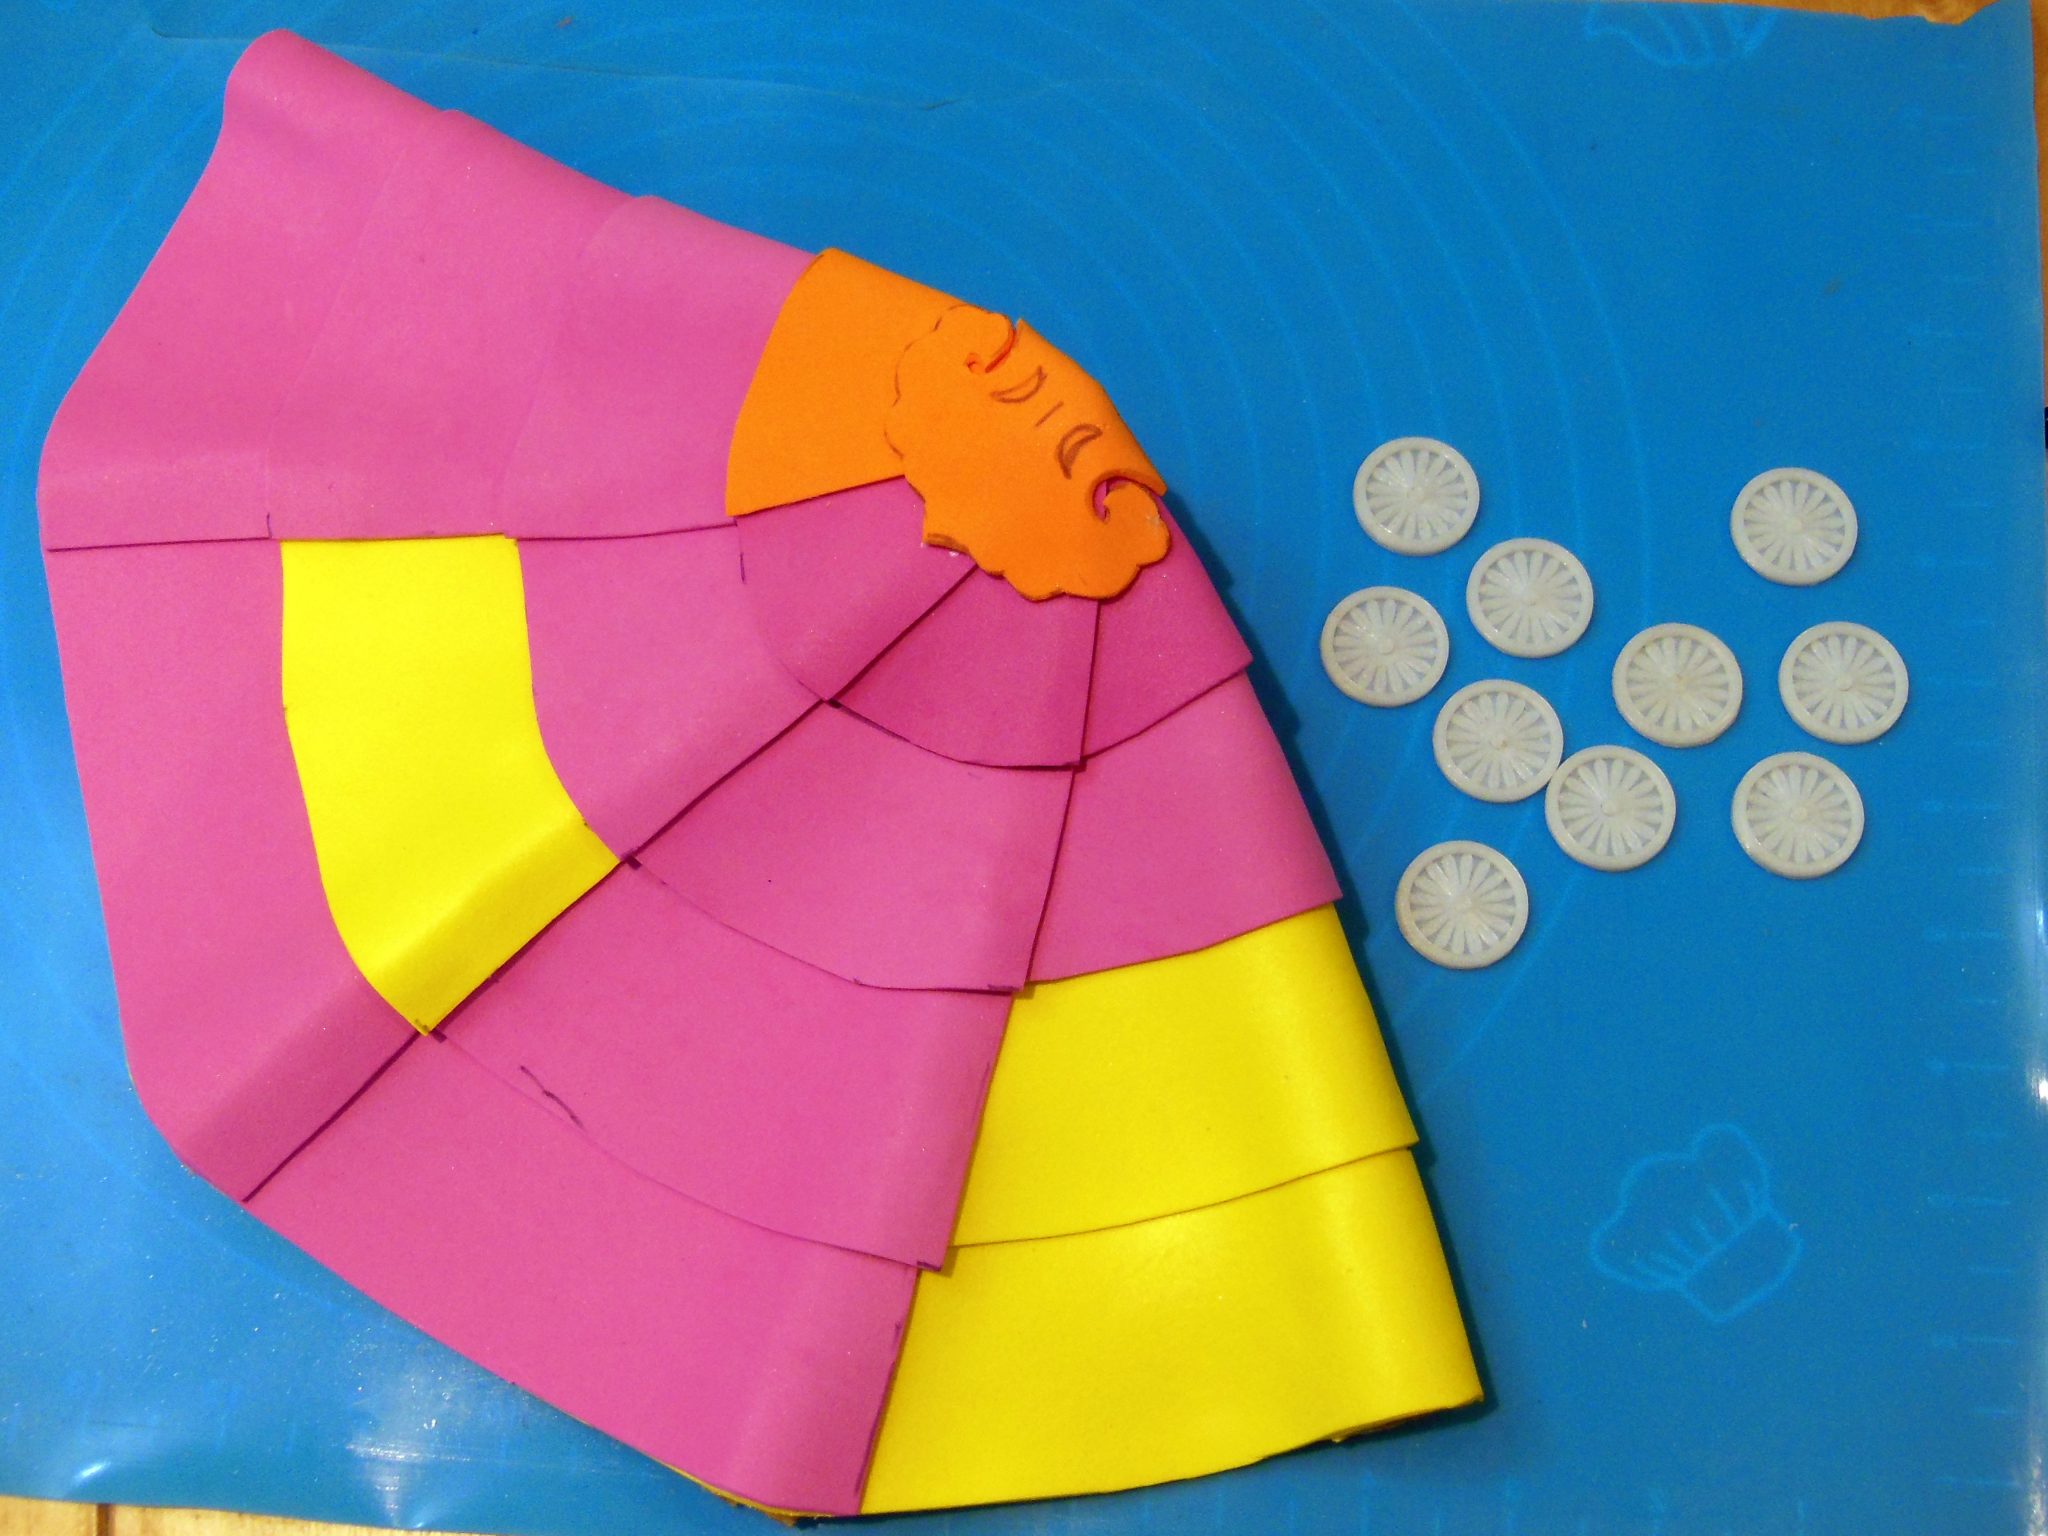
My first attempt at hip fins failed, as the shaping wasn’t ideal and they were too heavy. The second attempt had better shaping, and were largely foam making them lighter. Each roof tile was a thin sheet of overlapping foam. The lattice of support struts were also foam, glued, cut and dremeled into shape. The circular end tiles were 3D modeled and printed to have the chrysanthemum crest. The constructed hip fins were then primed and painted. The plan to mount the fins and bust piece was to use neodymium magnets, but the ones I bought were too weak and the pieces easily fell off. I eventually resorted to velcro, not as pretty but very secure!
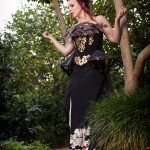
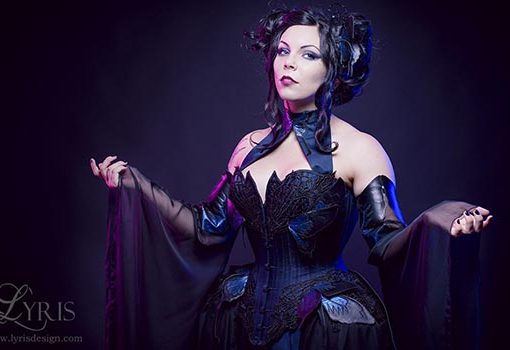
I was very happy with the fit of the finished corset when my lovely model Miss Twisted tried it on. We photographed it with the marvelous Sol Santana Photography.


